Raspberry Pi 5 with 52Pi NVMe hat, Samsung 990 EVO SSD - faster for Ollama and LLMs?
This blog post explains setting up a Raspberry Pi 5 with an NVMe SSD hat for better disk performance. The goal is to compare the benchmark with the SD card Pi, and test the performance impact on running LLMs with Ollama.


A second Raspberry Pi 5 setup was required to perform comparison benchmarks with Ollama and LLMs, inspired by Philippe's tweets. Instead of upgrading the existing Pi, I decided to invest into a new Pi setup, building on the existing hardware experience.
This blog post discusses and verifies each step for a better learning experience: Basic setup with an SD card, NVMe SSD hat research and assembly, boot image, benchmarks, and first attempts with LLMs and Ollama.
Basic setup with SD card
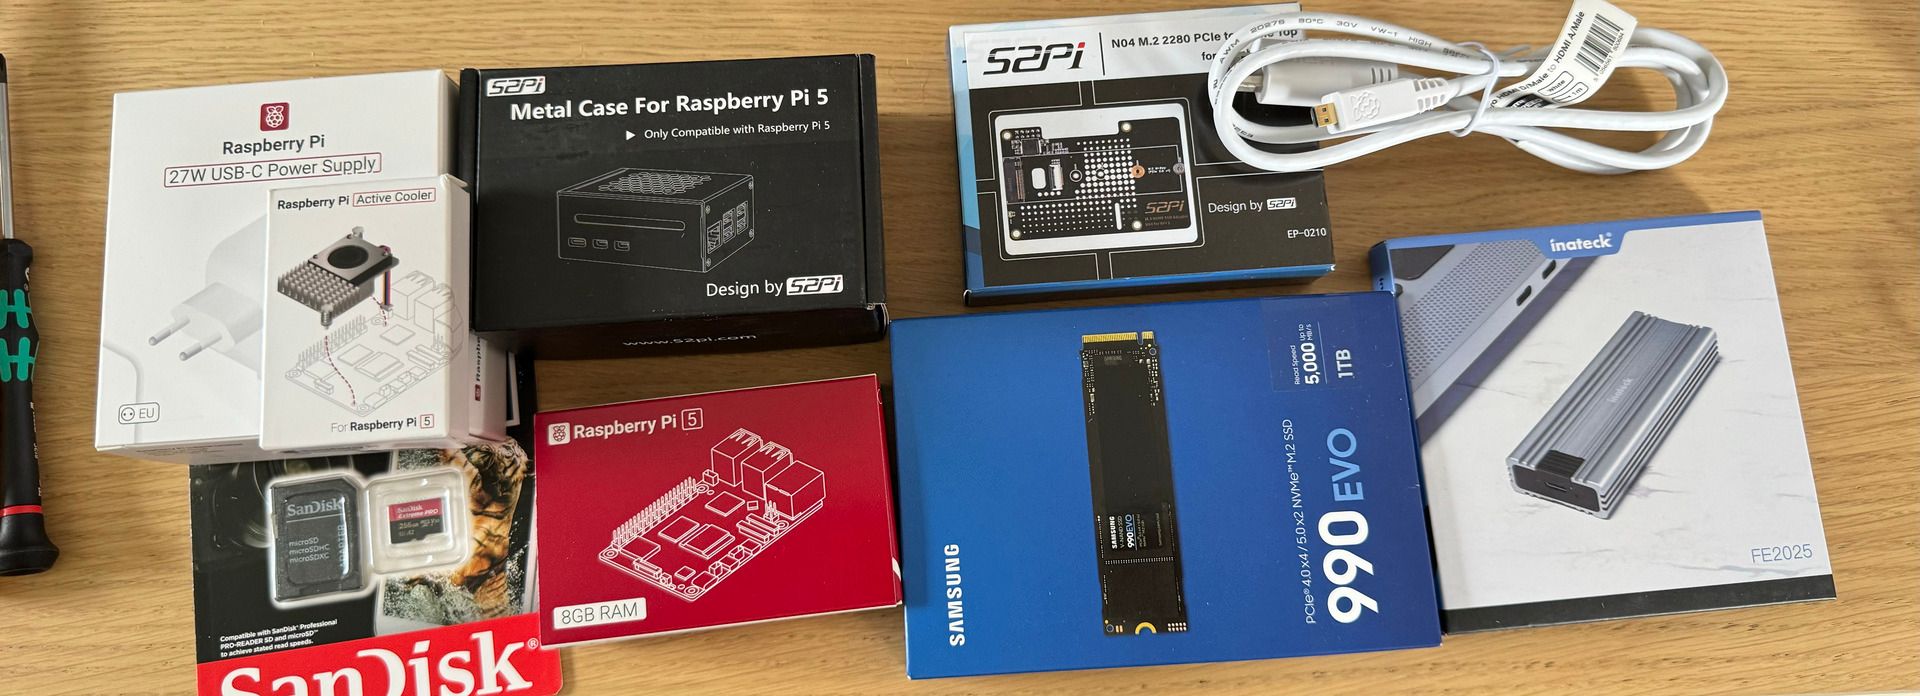
Similar to the first Raspberry Pi 5 blog post, the required basic components are
- Raspberry Pi 5, 8 GB, Cooler Kit - 115 EUR - Weletron (official seller), raspberrypi.com with more alternatives
- SanDisk Extreme Pro microSD 256 GB - 32 EUR - WD store, amazon.de
- Metal case: GeeekPi Metal Case for Raspberry Pi 5, Support PCIe M.2 NVMe SSD Shield Top X1001 / X1000 / N04 /N05 & Raspberry Pi 5 Active Cooler - 16 EUR - amazon.de
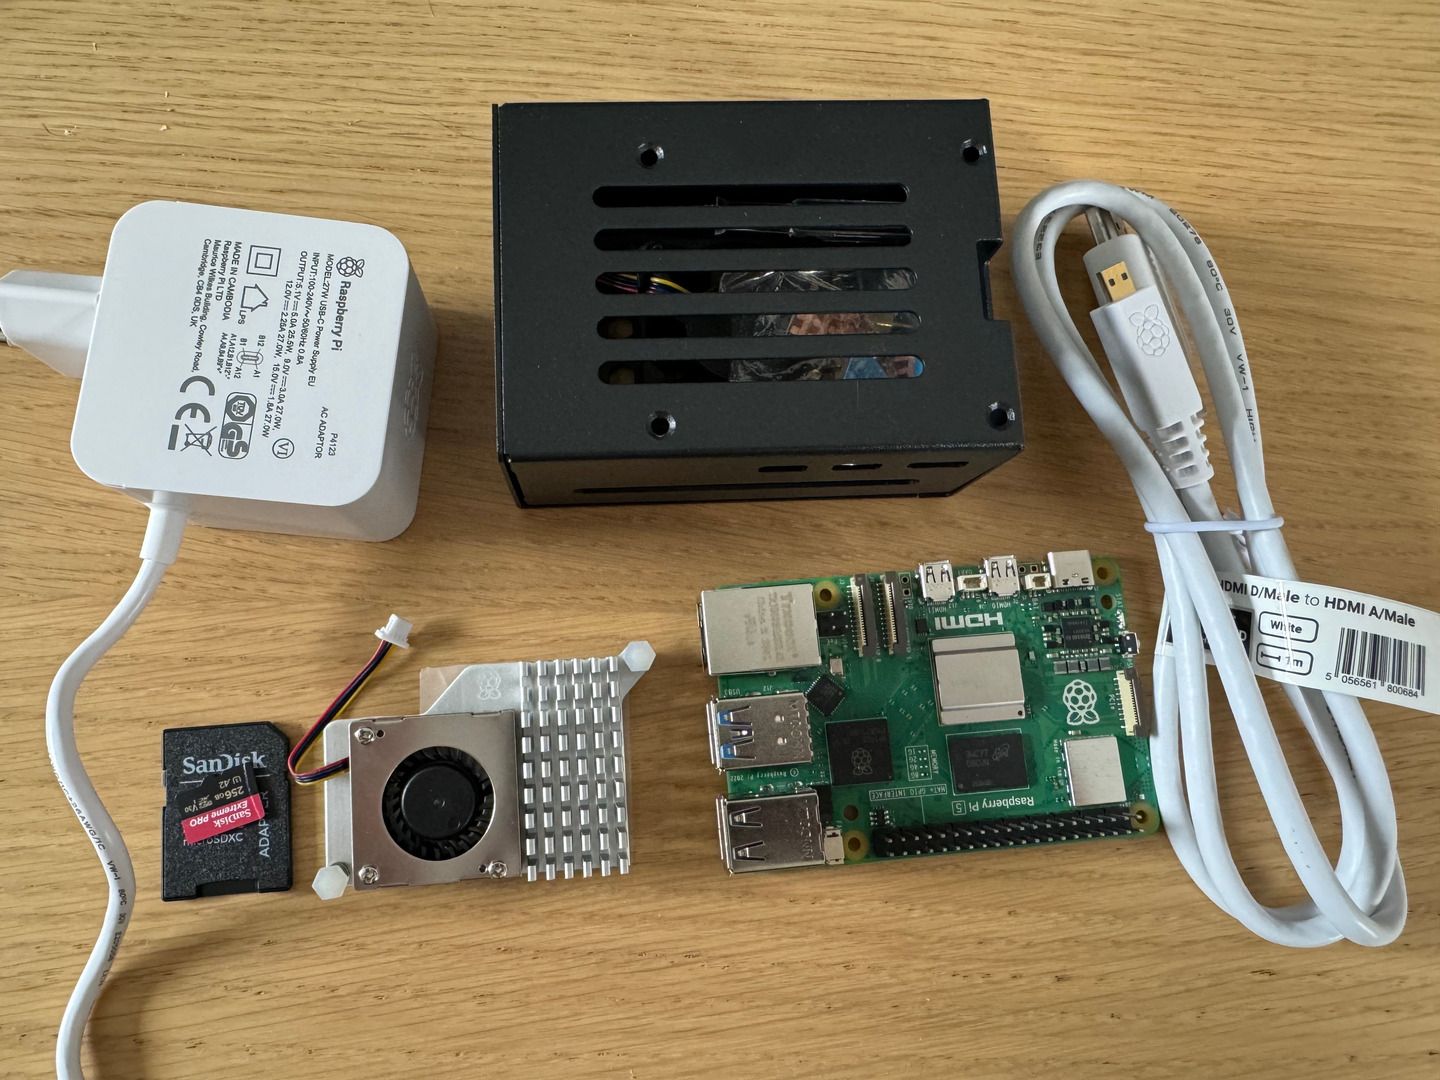
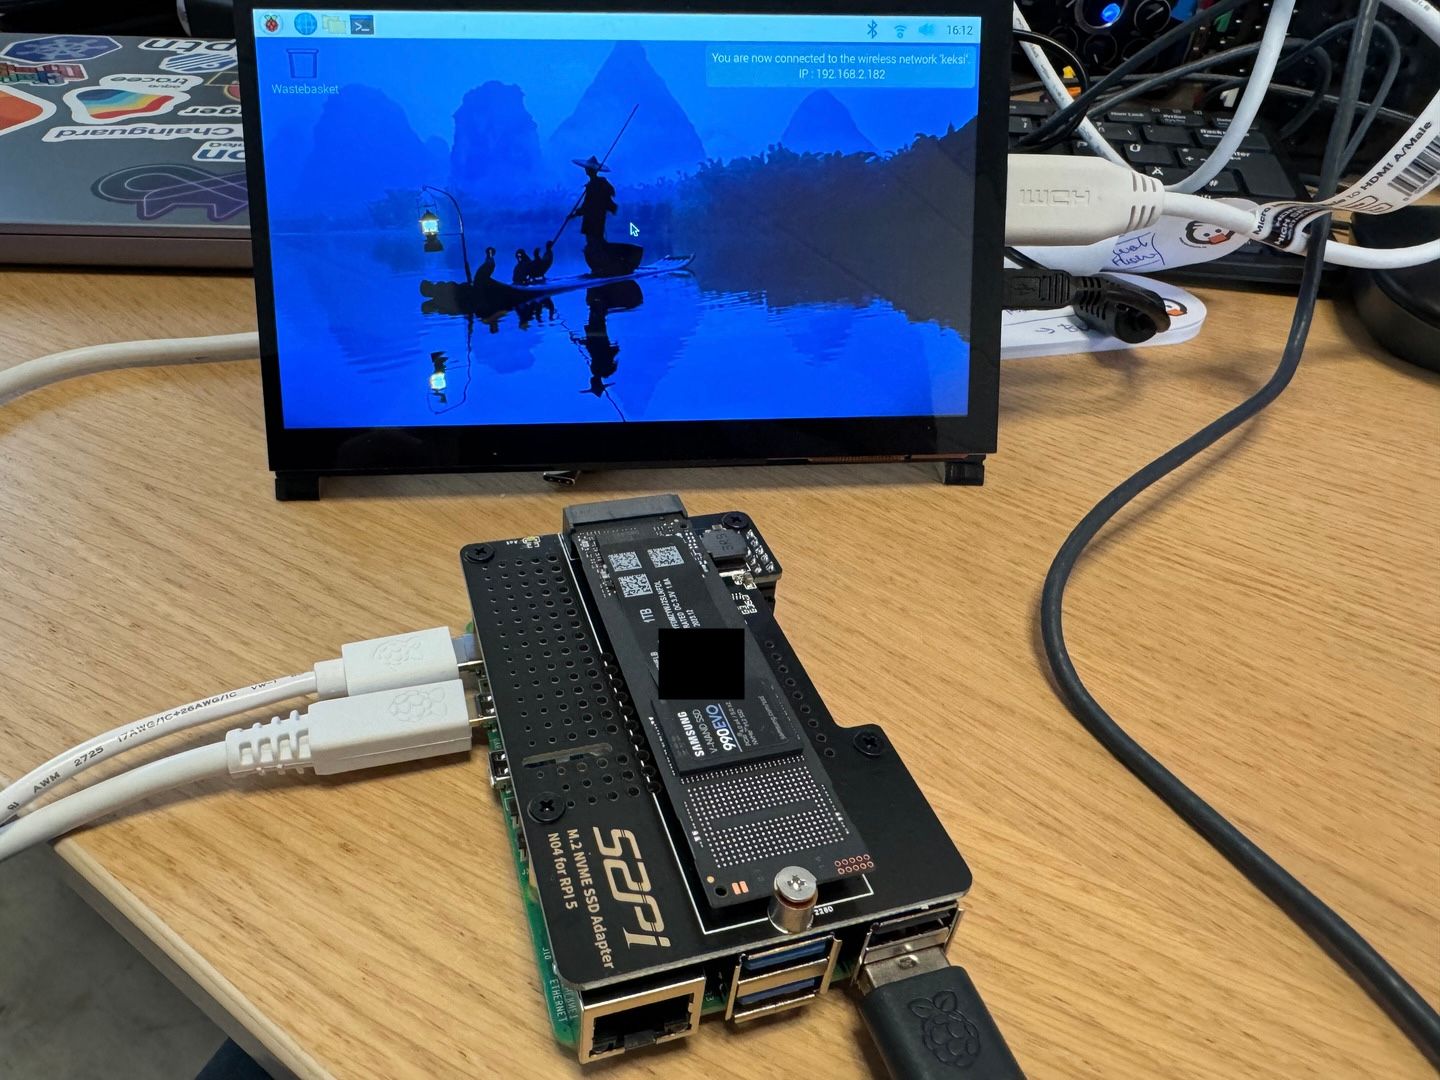
Assemble the parts, and attach all cables, including the HDMI connection to an external display, and keyboard/mouse.
Flash the SD card with the Raspberry Pi OS, and use the same settings described in this blog post. The only modification is the host name: llama-ssd-pi5.
Connect display, keyboard, mouse, network. Plug in the power connector on the USBC port. After verifying that the initial setup works, the next steps describe the research and assembly of the NVMe SSD storage.
NVMe SSD hat
My initial research brought me to the NVMe Base for Raspberry Pi 5 – NVMe Base + 500GB SSD by Pimoroni, inspired by Philippe Charrière's blog post about running Ollama on a Pi5. The GeeekPi Metal Case on the other side supports NVMe SSDs with a so-called "hat" on top of the Pi.
Compatibility with SSDs
I've found a forum topic on Volumio about PCIe NVMe compatibility which led me to understand that there are different form factors for SSDs: 2230, 2240, 2280.
So-called expansion boards using PCI Express come in a variety of vendors, and many of them aim to support the official Raspberry Pi active cooler, through additional holes in the boards for example.
The following video by Jeff Geerling introduced how the PCI Express connector works, and how the different boards would work together, and how the active cooler can still be used.
The GeeekPi metal case specifically recommends the 52Pi hat family which comes in two variations:
- N05, supporting 2230 and 2242 form factor SSDs. Does not support 2280, PCIe cable is on the outside. Entry in the Raspberry Pi PCIe database.
- N04, supporting 2230, 2242, 2260, 2280 form factor SSDs. PCIe cable is connected through a hole in the board. Entry in the Raspberry Pi PCIe database.
The 52Pi NVMe boards require power supply through GPIO pins 1-10, which cannot be used for anything else. The advantage is no external power supply for SSDs that require more power. Before buying the 52Pi NVMe hat, I also watched the following video to get an idea how the assembly works.
There are other NVMe PICe vendors such as GeekWorm, Pineperry, Waveshare, etc. that would require more research on compatibility, but I decided to with the GeeekPi recommendation.
- GeeekPi N04 M.2 M-Key NVMe SSD Shield for Raspberry Pi 5, M.2 2280 PCIe to NVMe SSD Shield Pip PCIe Peripheral Board Top for Raspberry Pi 5 4GB/8GB - 14 EUR - amazon.de
Compatible SSDs
I started searching for raspberry pi 5 nvme ssd and then refining to raspberry pi 5 nvme ssd samsung after learning that the current Samsung 980 series is supported. I have used Samsung SSDs for 10+ years and trust their reliability and speed. The following video was also helpful:
Some shops offer random SSDs that come bundled with an NVMe hat. Other options on Amazon describe the SSDs being extracted from OEM laptops. These SSDs are certainly cheaper compared to a 500GB or 1 TB model that aims for desktop and gaming PCs.
I do not trust used hardware, especially not storage devices without runtime, usage, operations documentation.
Therefore, I opted for the Samsung EVO series, which was a little cheaper and less power consuming, compared to the PRO series. Amazon also offered a discount, so I went with the 1 TB model instead of 500 GB for the Samsung 990 EVO model.
The Samsung EVO model uses the 2280 form factor, fitting the 52Pi NVMe hat.
- Samsung 990 EVO NVMe M.2 SSD 1TB, PCIe 4.0 x4 / PCIe 5.0 x2, NVMe 2.0 (2280), 5000MB/s Read, 3200MB/s Write, Internal SSD for Gaming and Graphics Editing, MZ-V9E1T0BW - 95 EUR - amazon.de

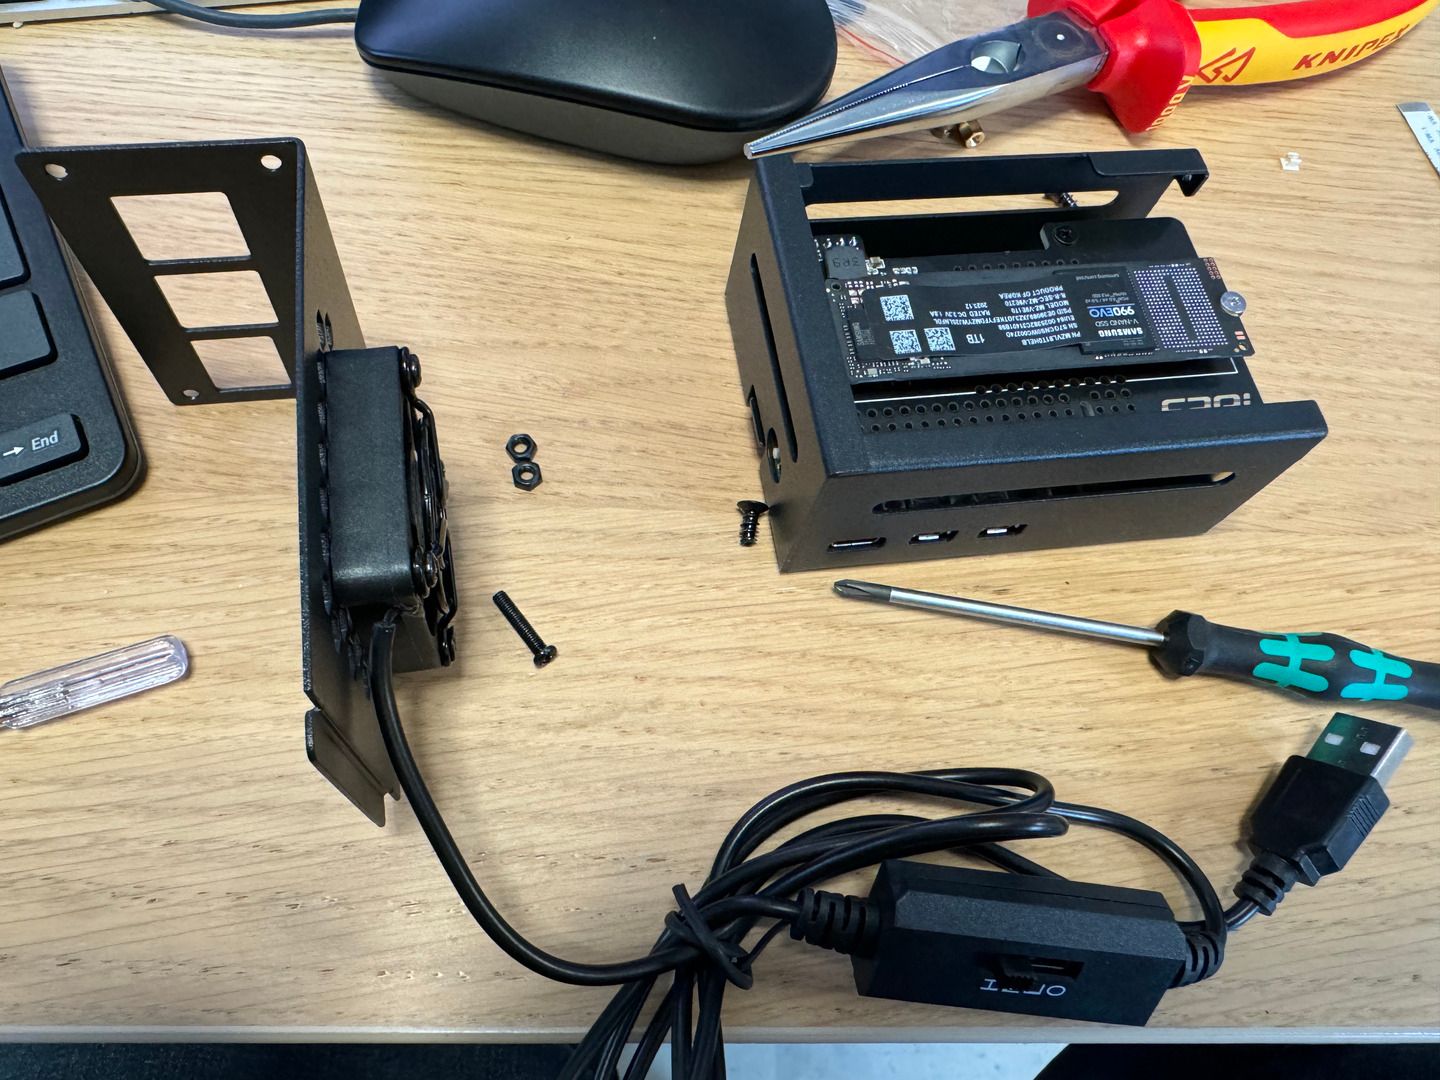
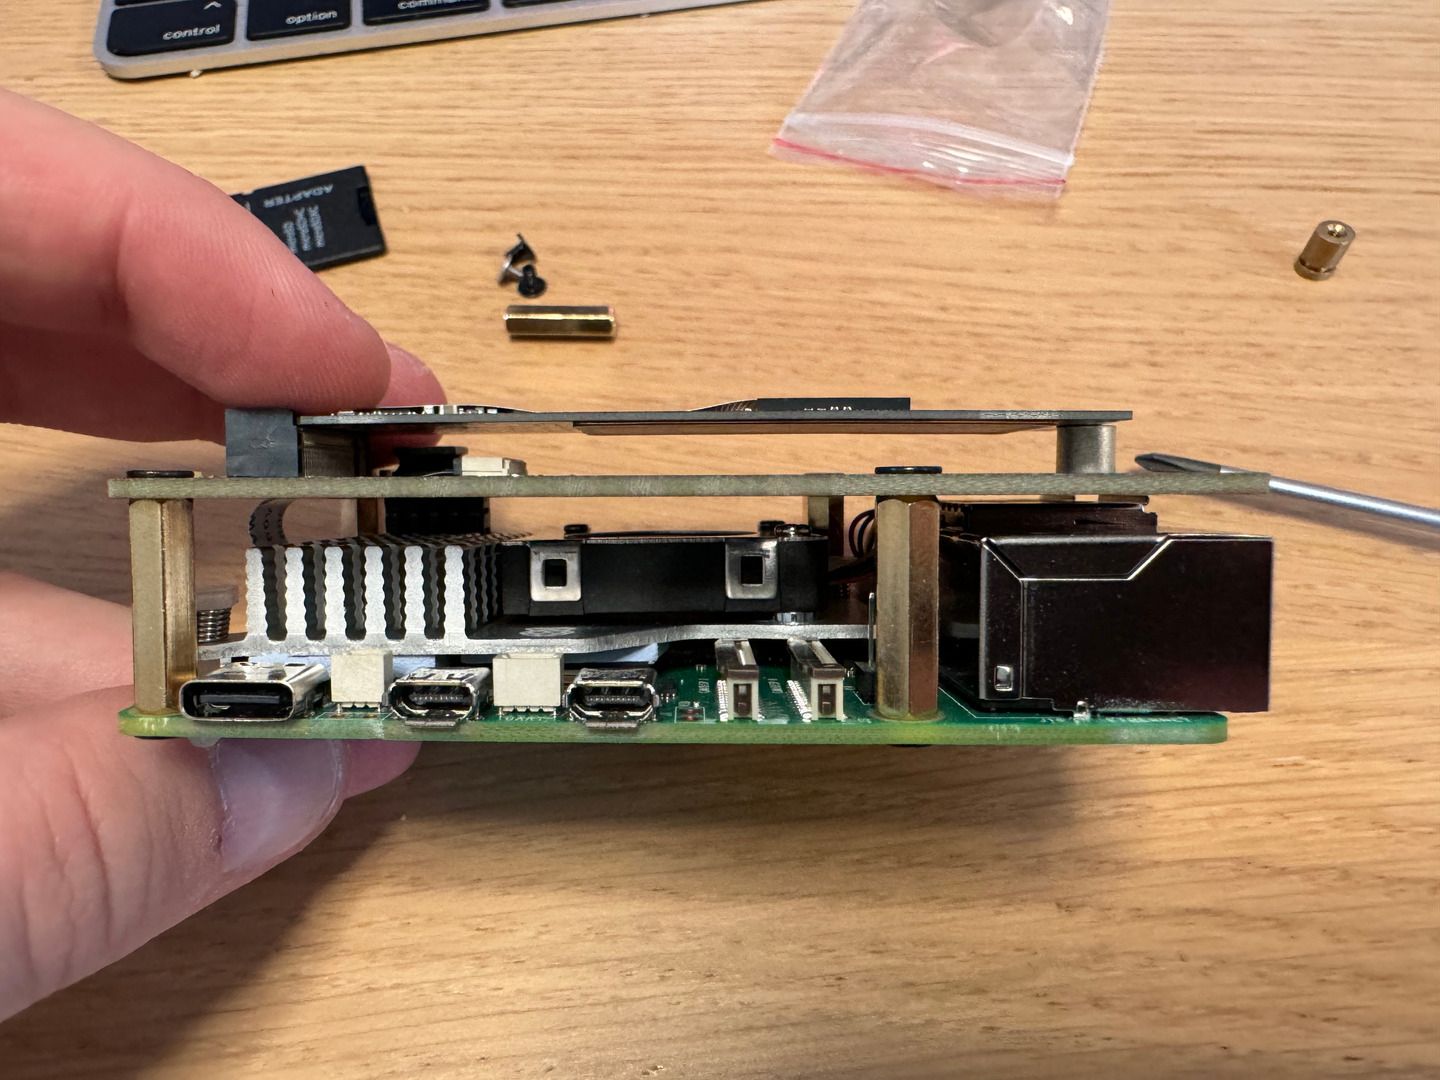
NVMe SSD hat assembly
Start with the PCIe connector on the NVMe hat board. Gently open the black gate on the white PCIe connector, and push the PCIe cable into it from the top. Close the gate, and verify that you cannot remove the cable.
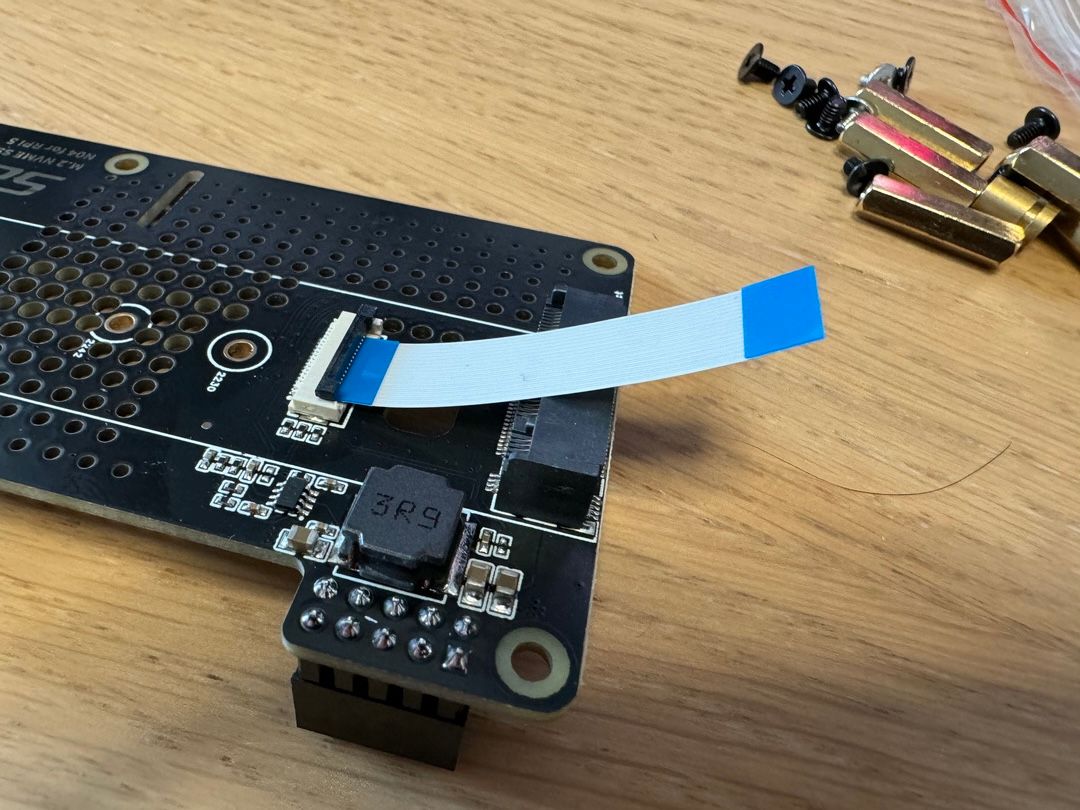
Next, fold the cable into the hole, so it reaches the Pi at the bottom later.
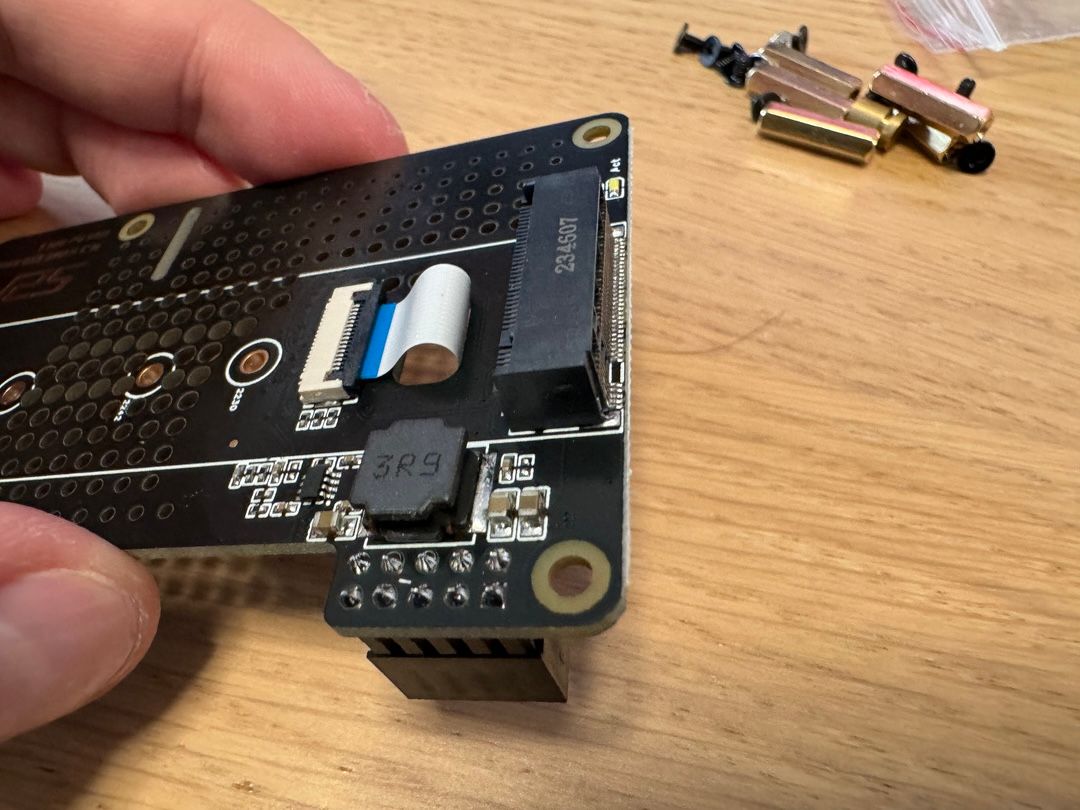
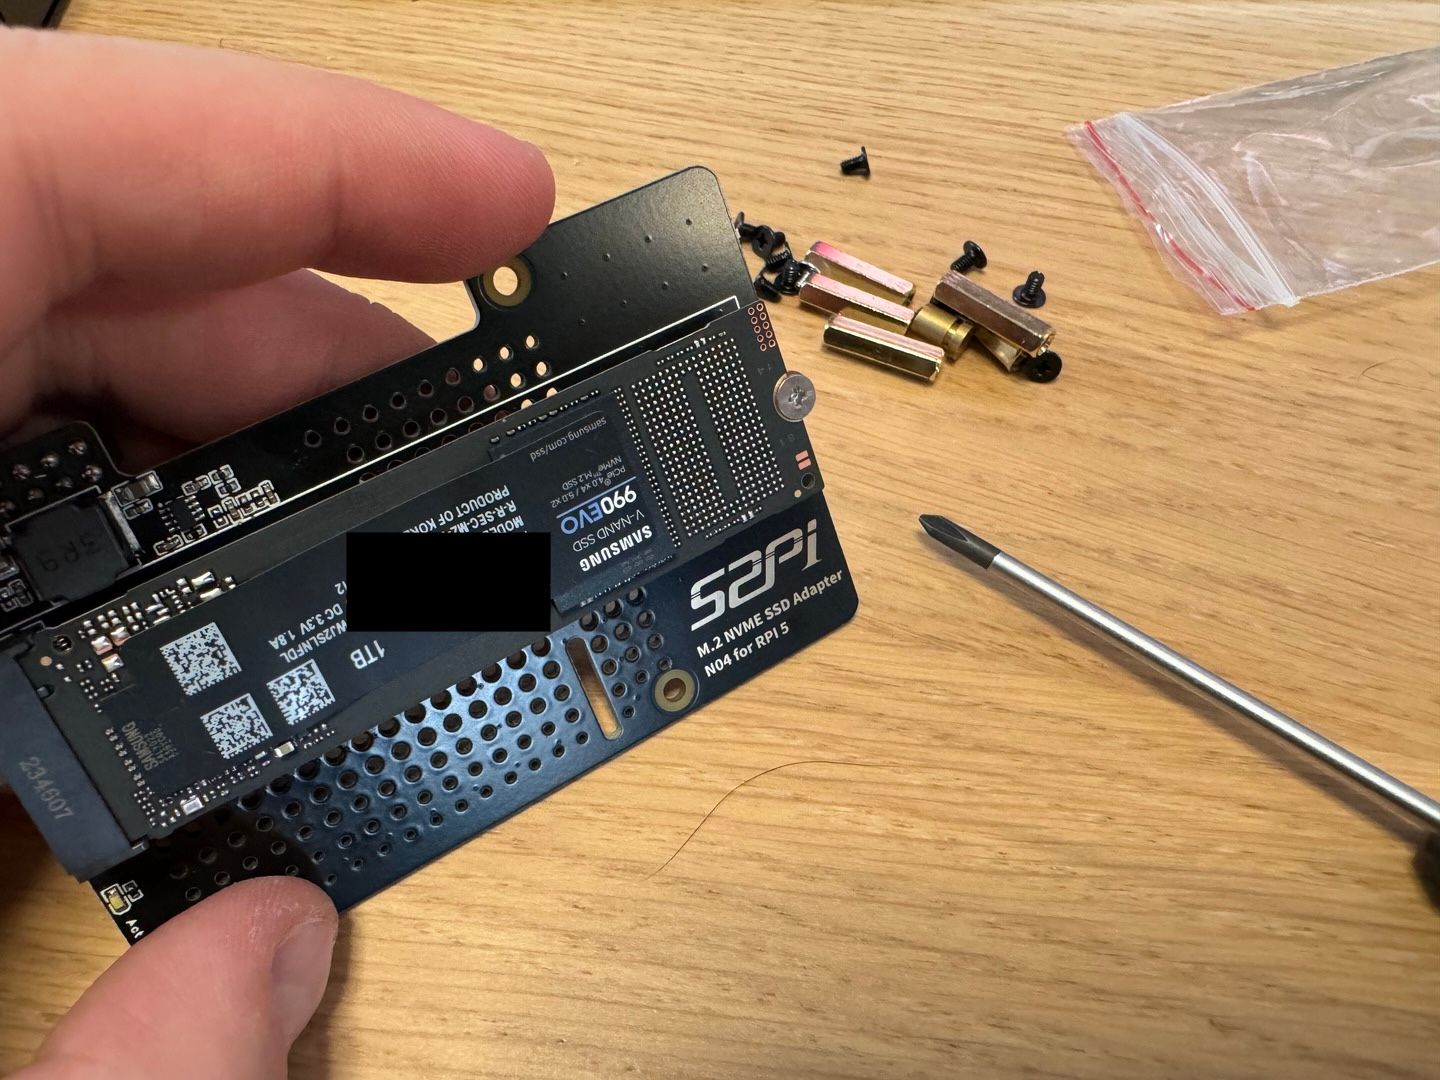
Once the cable is in place, attach the Samsung EVO SSD into the NVMe hat.
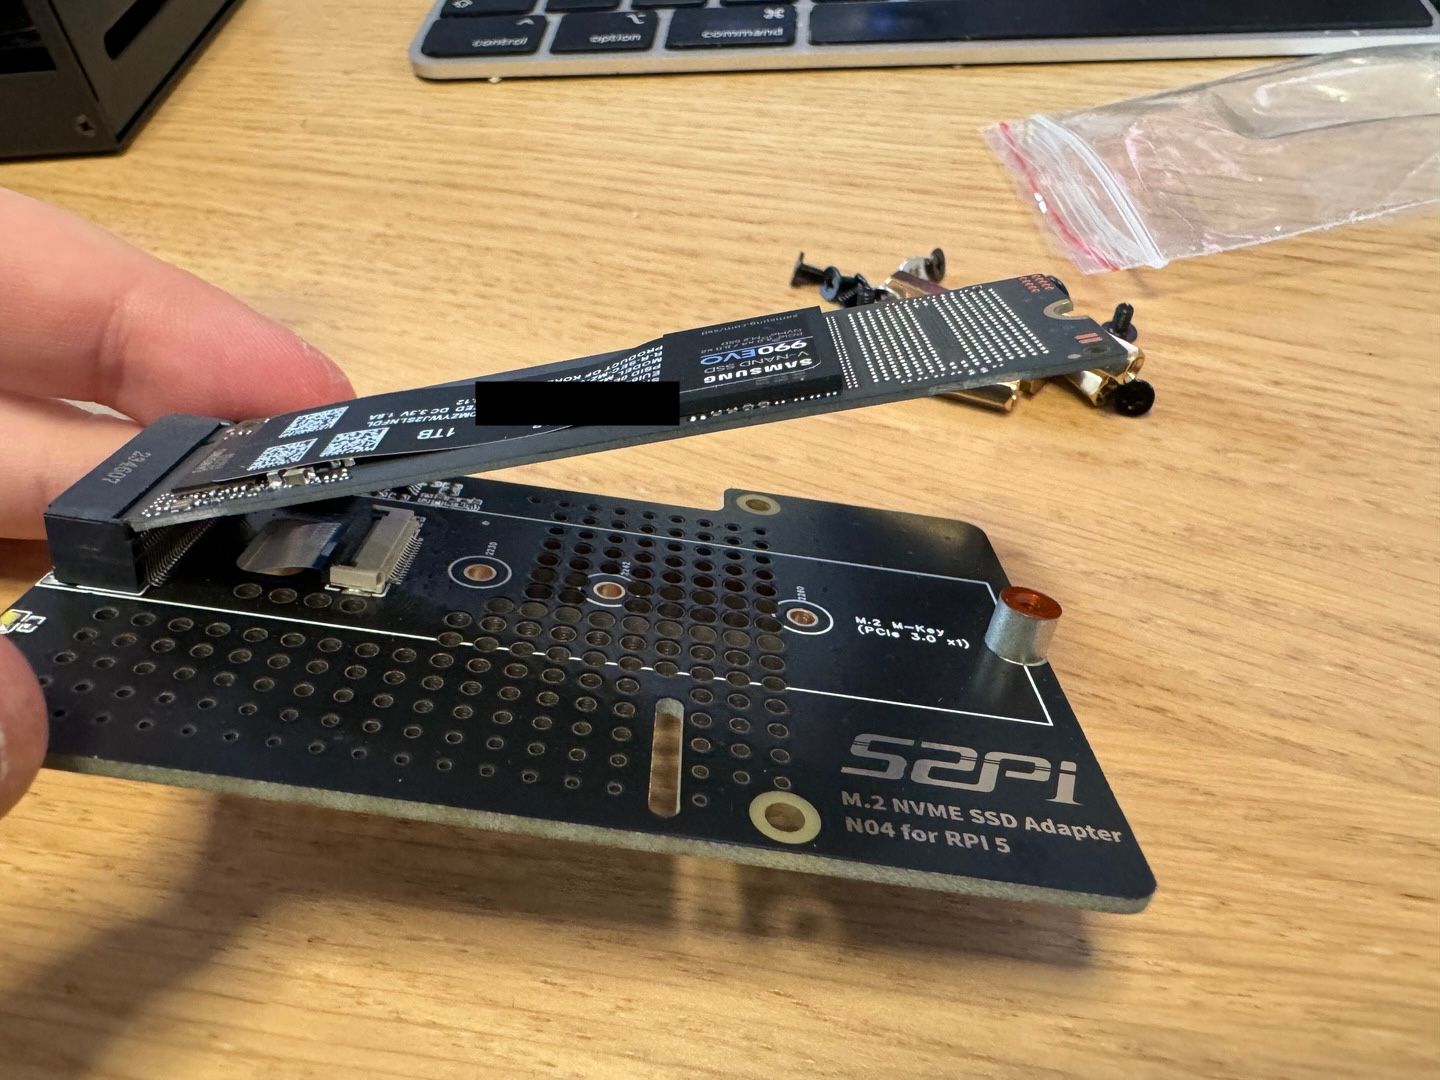
Use the provided, non-magnetic screw to hold the SSD in position.
Connect the NVMe SSD hat with the Pi
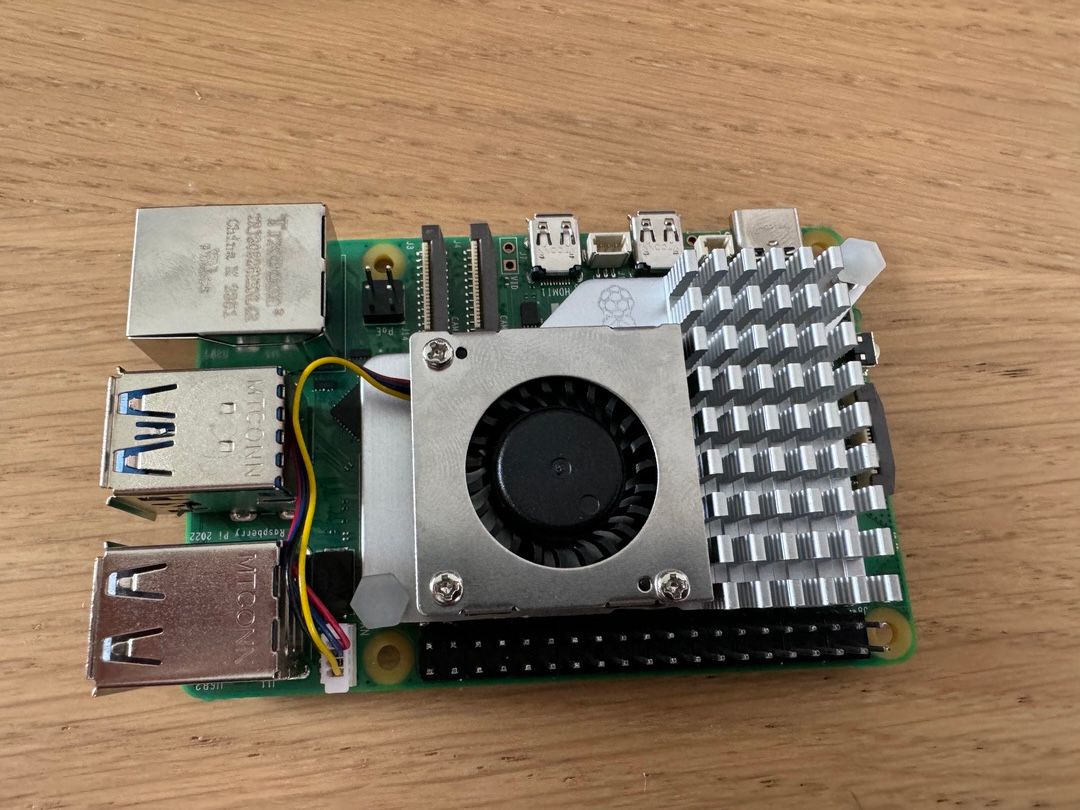
Prepare the Raspberry Pi board with the 4 included spacers and screws.
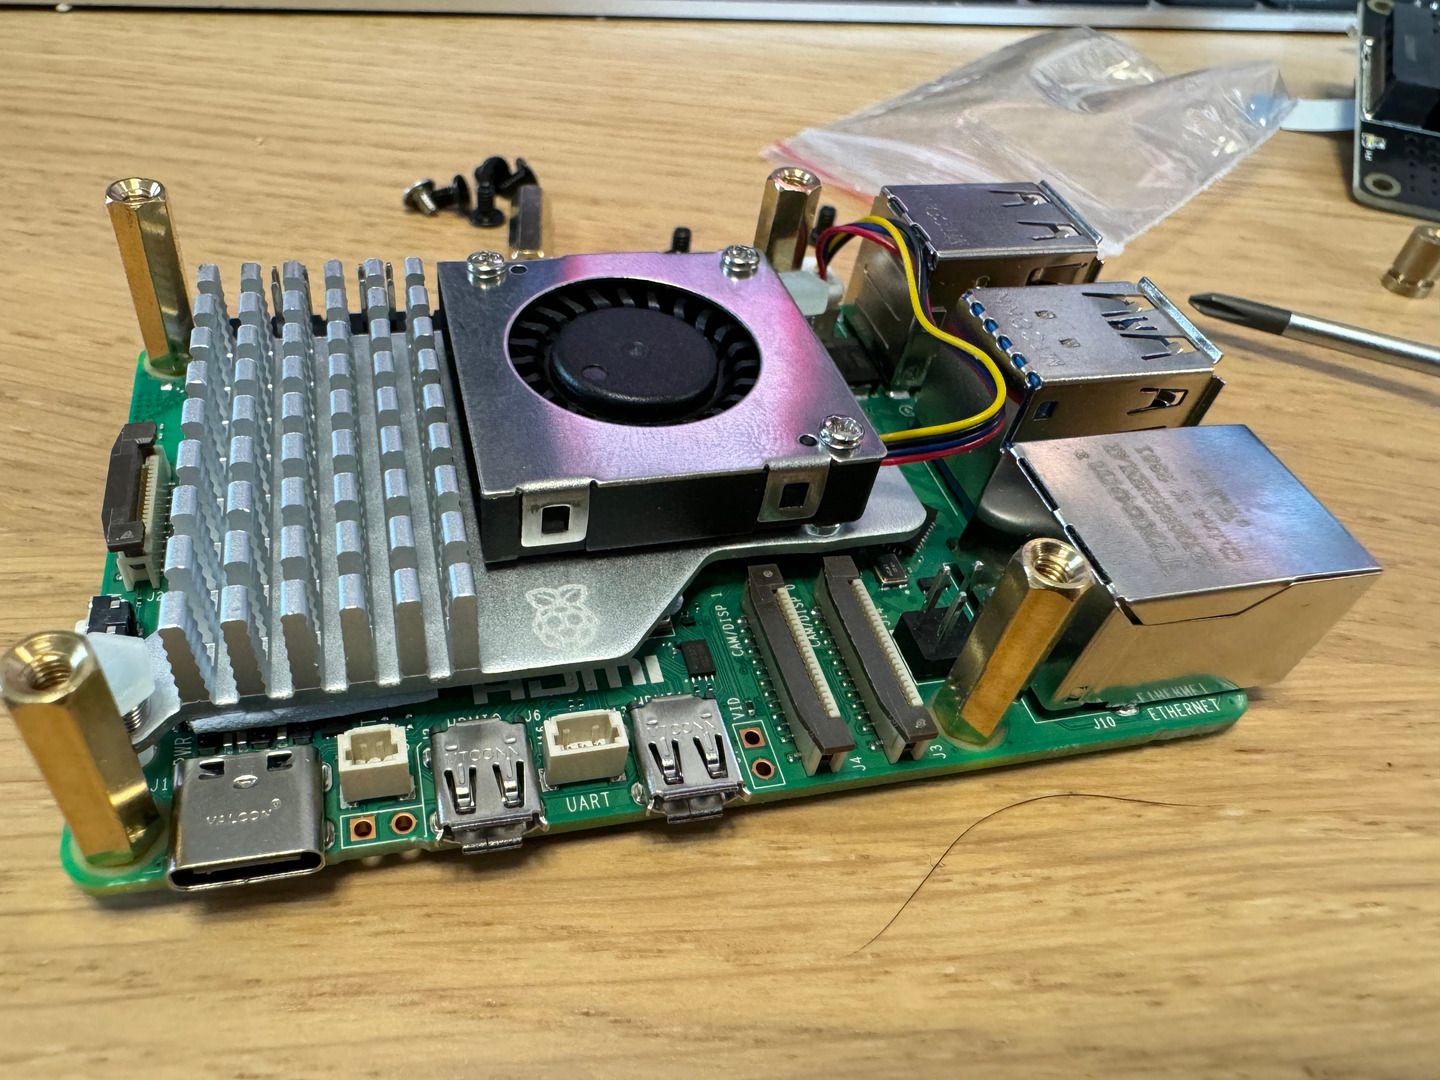
Before assembling the NVMe hat with screws to the Pi, gently hold both pieces and push the PCIe cable into the opened brown/black gate connector. Close the gate and check it holds safe.
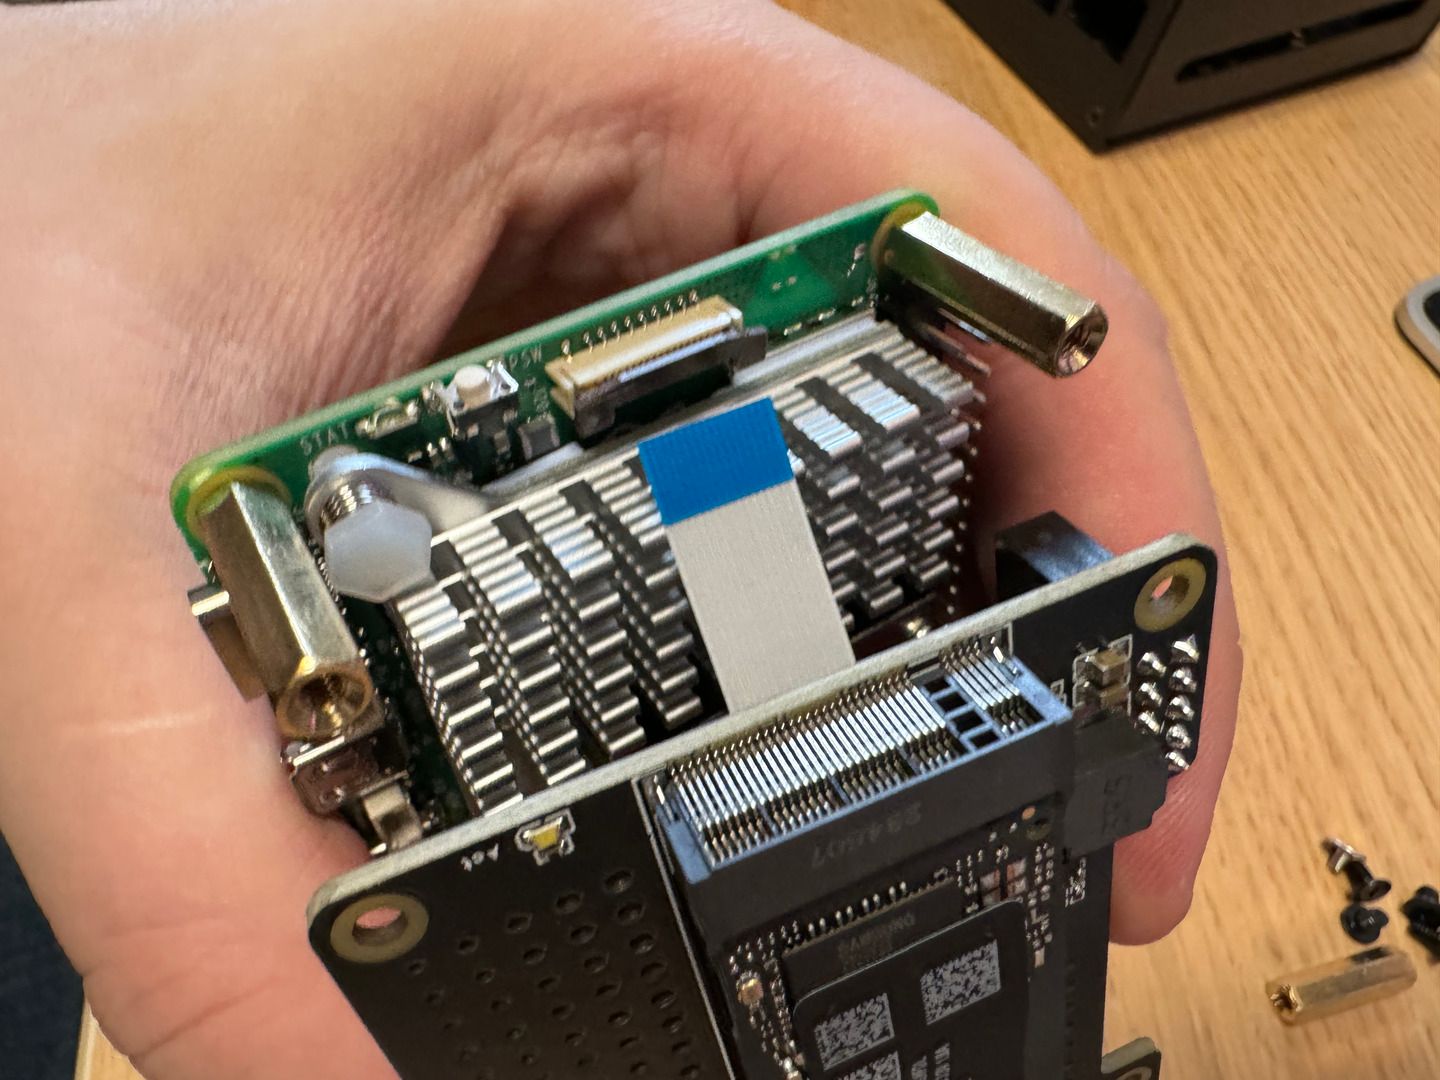
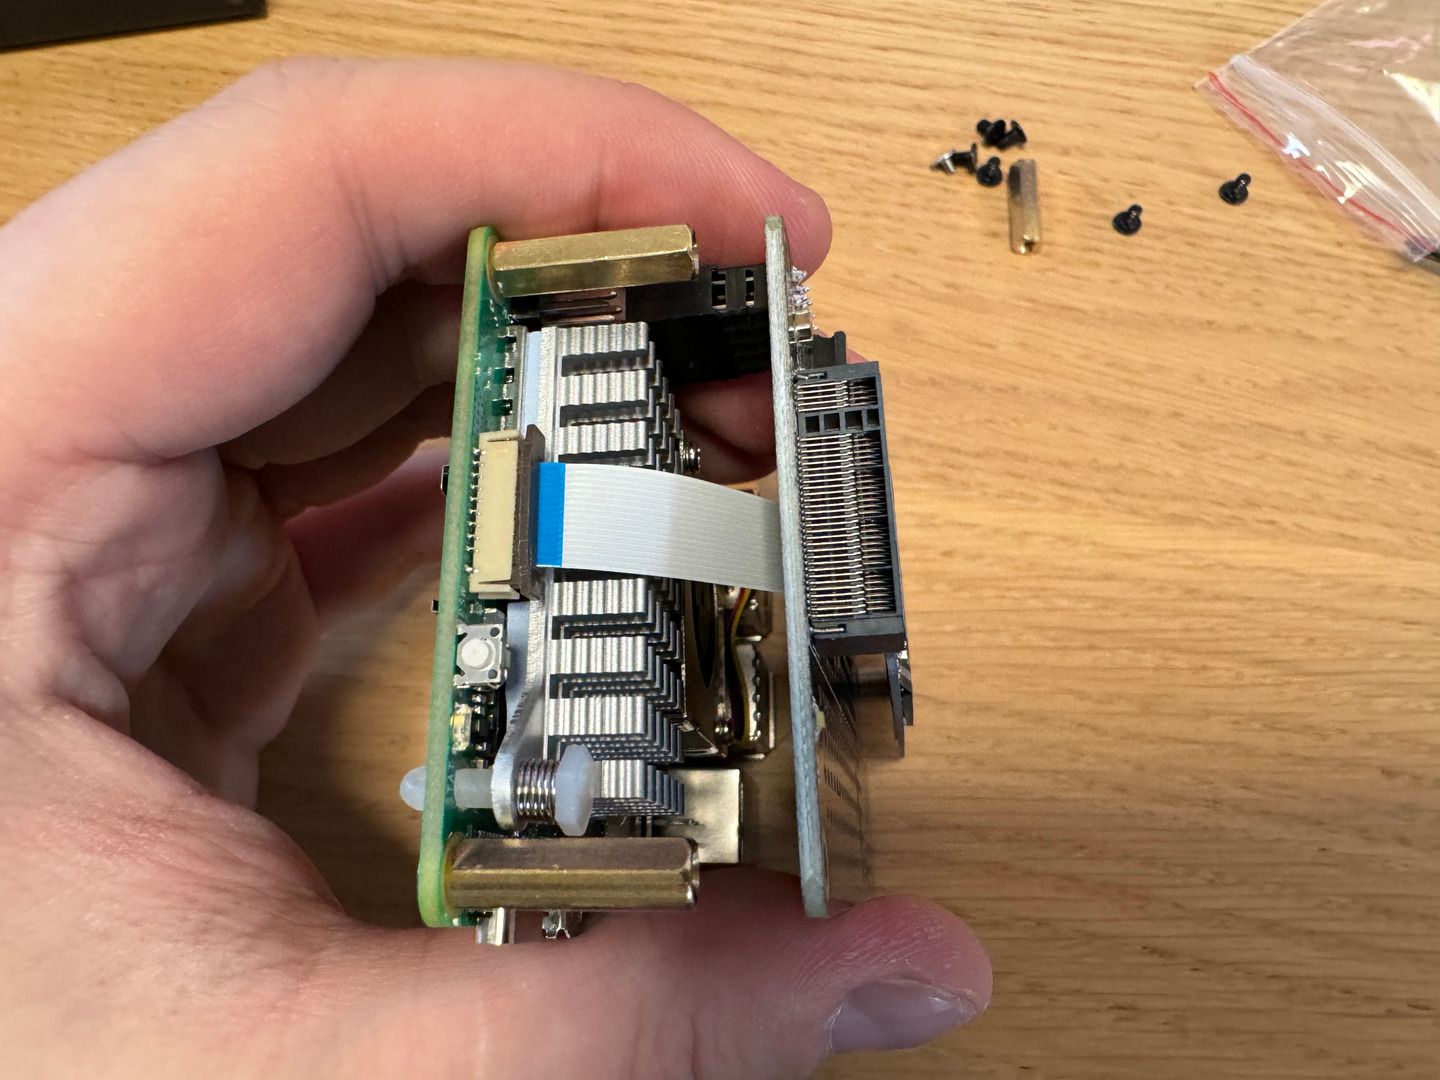
Next, connect the GPIO pins from the Pi to the NVMe hat.
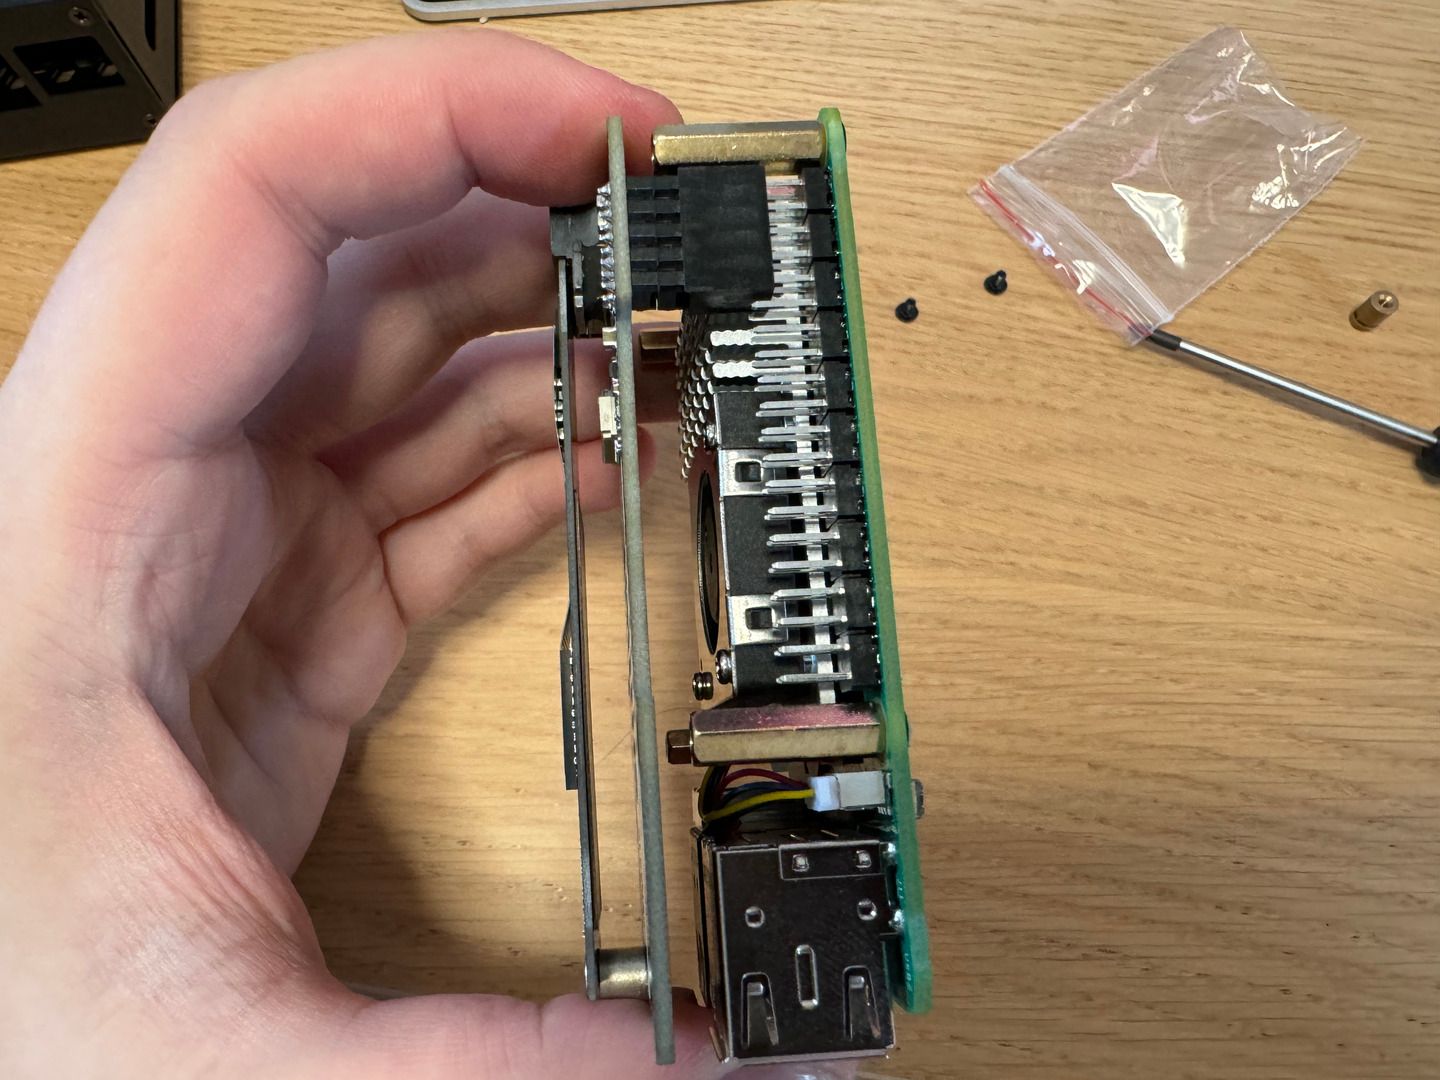
Use the remaining 4 screws to complete the assembly.
NVMe SSD boot image
The NVMe SSD needs to be flashed with the Raspberry Pi OS. The great thing is that the Raspberry Imager tool works the the same way, as long as you connect the SSD through an adapter.
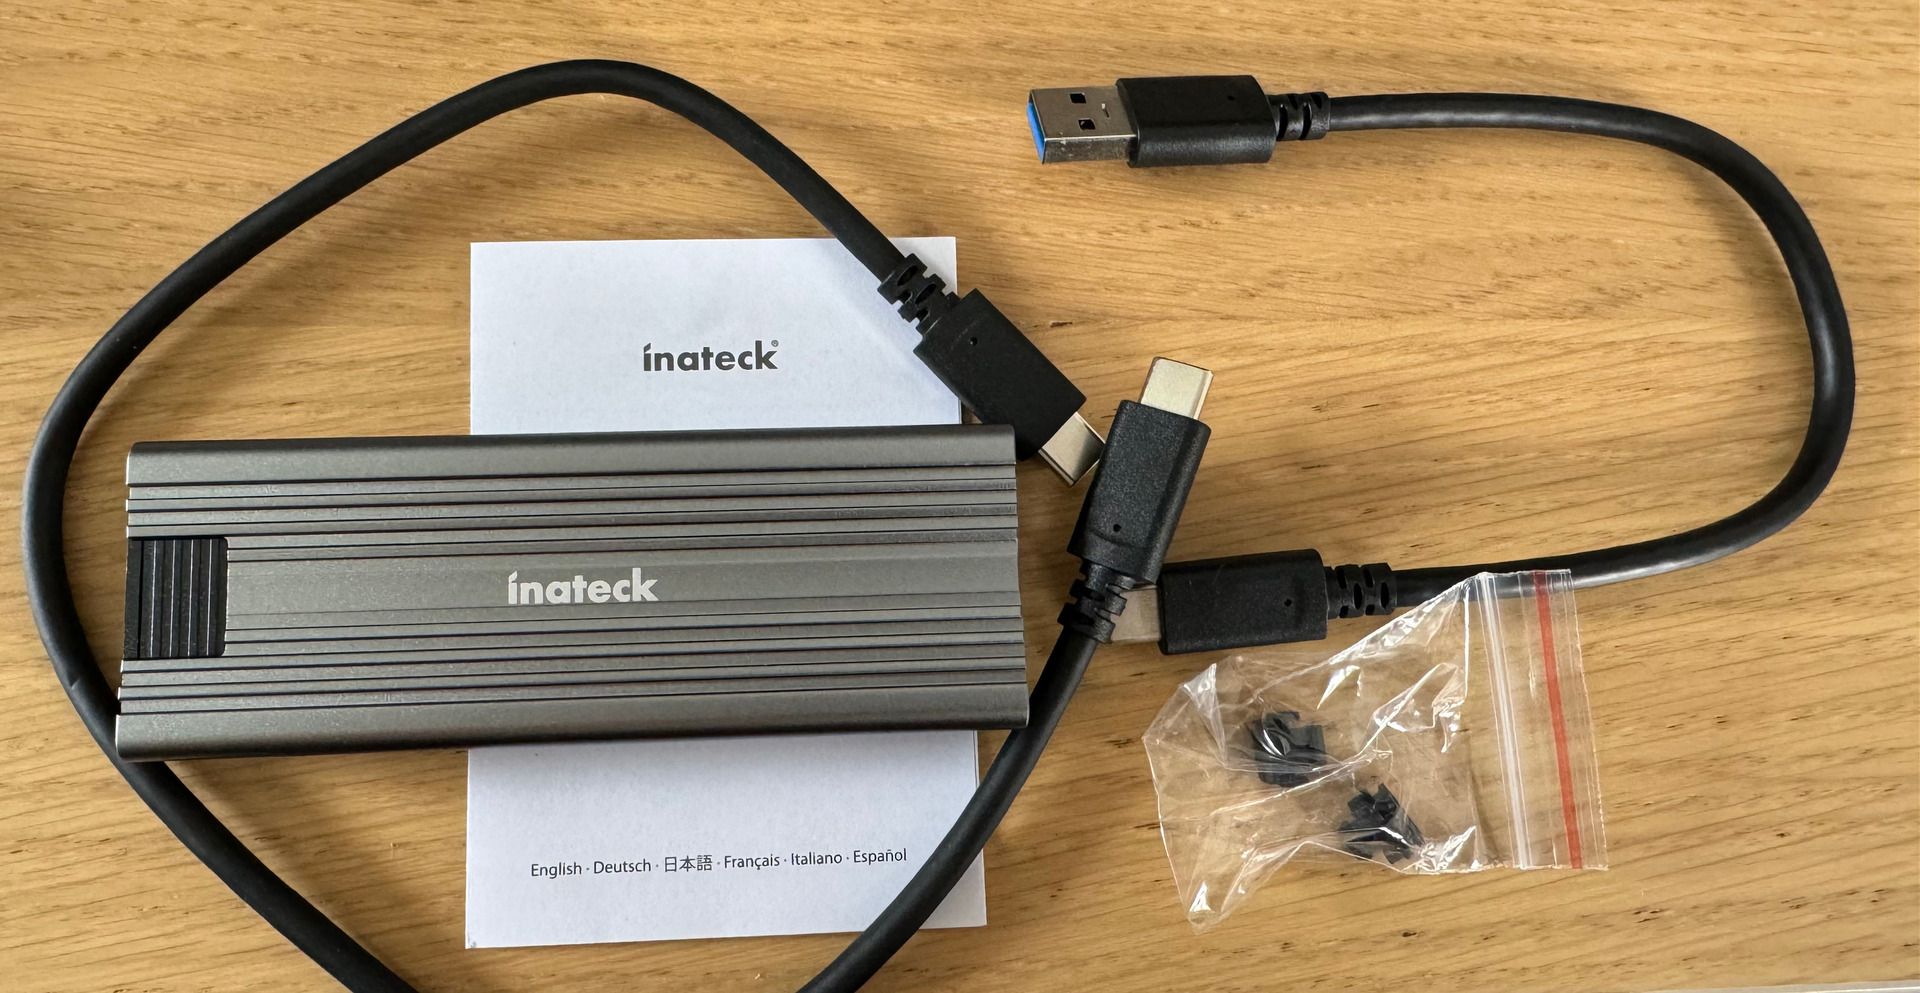
I purchased the following model, because it supports different form factors (2242, 2260, 2280), comes with USBC/A direct power supply support, and is relatively cheap with 20 EUR. You will only need it once for everyone NVMe SSD setup, which did not justify a higher price and more comfort with plug&play devices.
- Inateck NVMe M.2 USB 3.2 Hard Drive Enclosure with Cooling Pad 10 Gbps, Supports M.2 SATA B+M Key and NVMe M Key/B+M Key SSD (2242, 2260, 2280) with USB CC and USB AC Cable, Tool-Free, FE2025 - 20 EUR - amazon.de
Boot image preparation
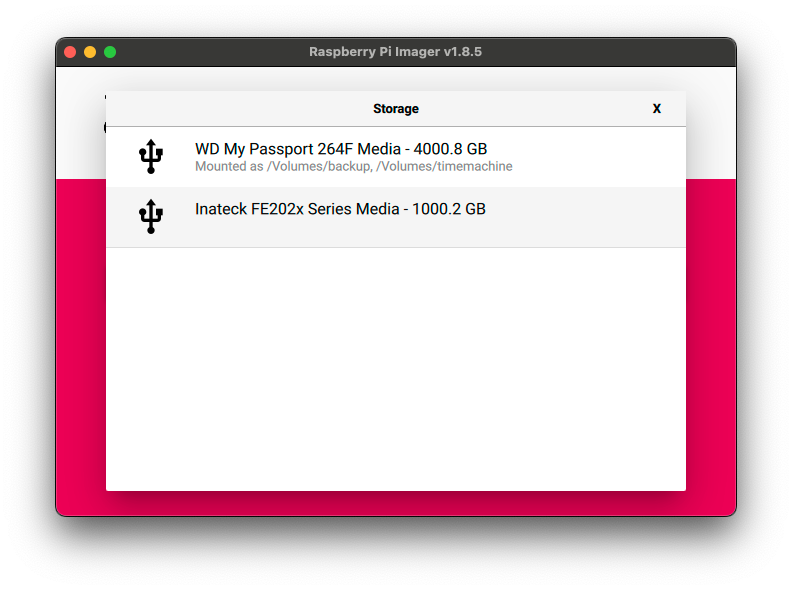
Disassemble the SSD from the Pi hat by removing the screw again, and insert it into the Inateck adapter. Connect the USB-C cable to the host system, for example, macOS.
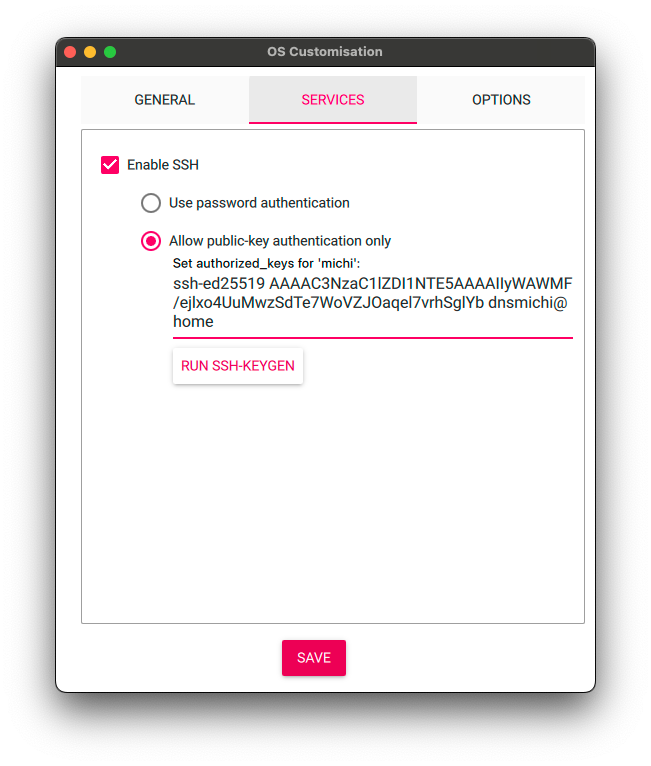
Start the Raspberry Pi Imager and select the Inateck device.
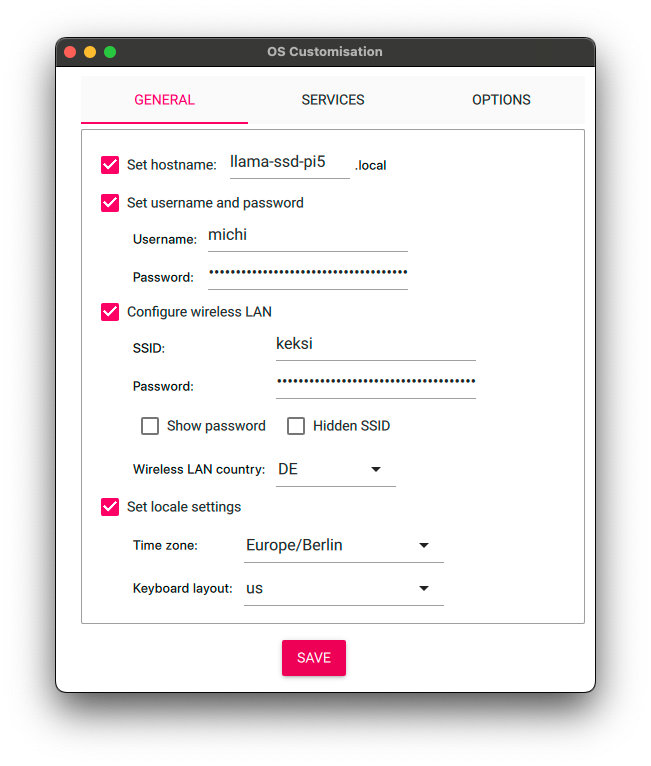
Choose to edit the OS customizations, and modify the hostname to llama-ssd-pi5. Keep all other settings from the previous setup.
Eject the USB-C device, and remove the SSD from the Inateck adapter. Re-assemble it with the NVMe hat.
Boot from NVMe SSD
Boot into the Raspberry Pi OS, using the SD card. The PCI express connection for the NVMe SSD hat is not enabled by default, and requires the following settings in the /boot/firmware/config.txt file. Note: The GeeekPi hat documentation says /boot/config.txt but opening that file will show a warning and the suggestion for the correct file to edit.
The connection is certified for Gen 2.0 speed (5 GT/sec), but you can force it to Gen 3.0 (10 GB/sec) with the second line.
vim /boot/firmware/config.txt

dtparam=pciex1
dtparam=pciex1_gen=3
Reboot the Pi.
To enable boot from NVMe SSD, open a terminal to edit the EEPROM.
sudo rpi-eeprom-config --edit

PCIE_PROBE=1
BOOT_ORDER=0x4f16
Note: The default opened editor is nano. Use ctrl w and ctrl x to save and quit.
Wait until the firmware update has been flashed, and then reboot the Raspberry Pi 5.
Open a new terminal, and inspect the newly mounted /boot devices using the df -h command.
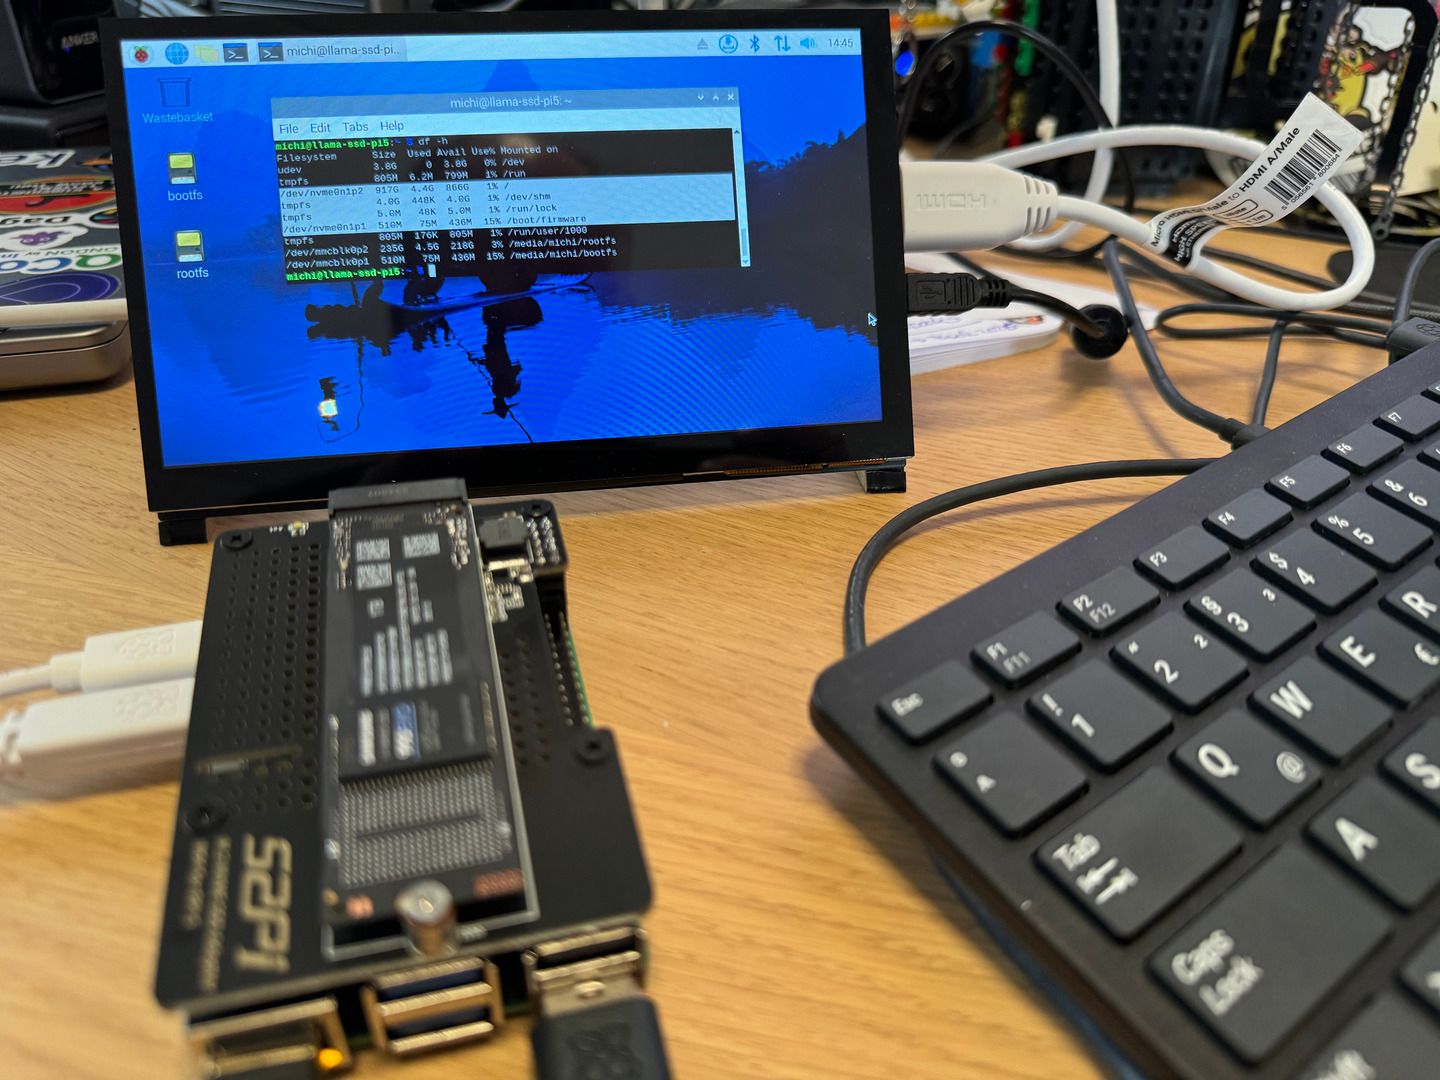
Note: The former partitions from the SSD card are mounted in the /media/<username> directory automatically. Shutdown the Pi, and safely remove the SSD card - or you unmount it, and format it to a Linux compatible disk format, e.g. by installing gparted or mkfs tools on the CLI.
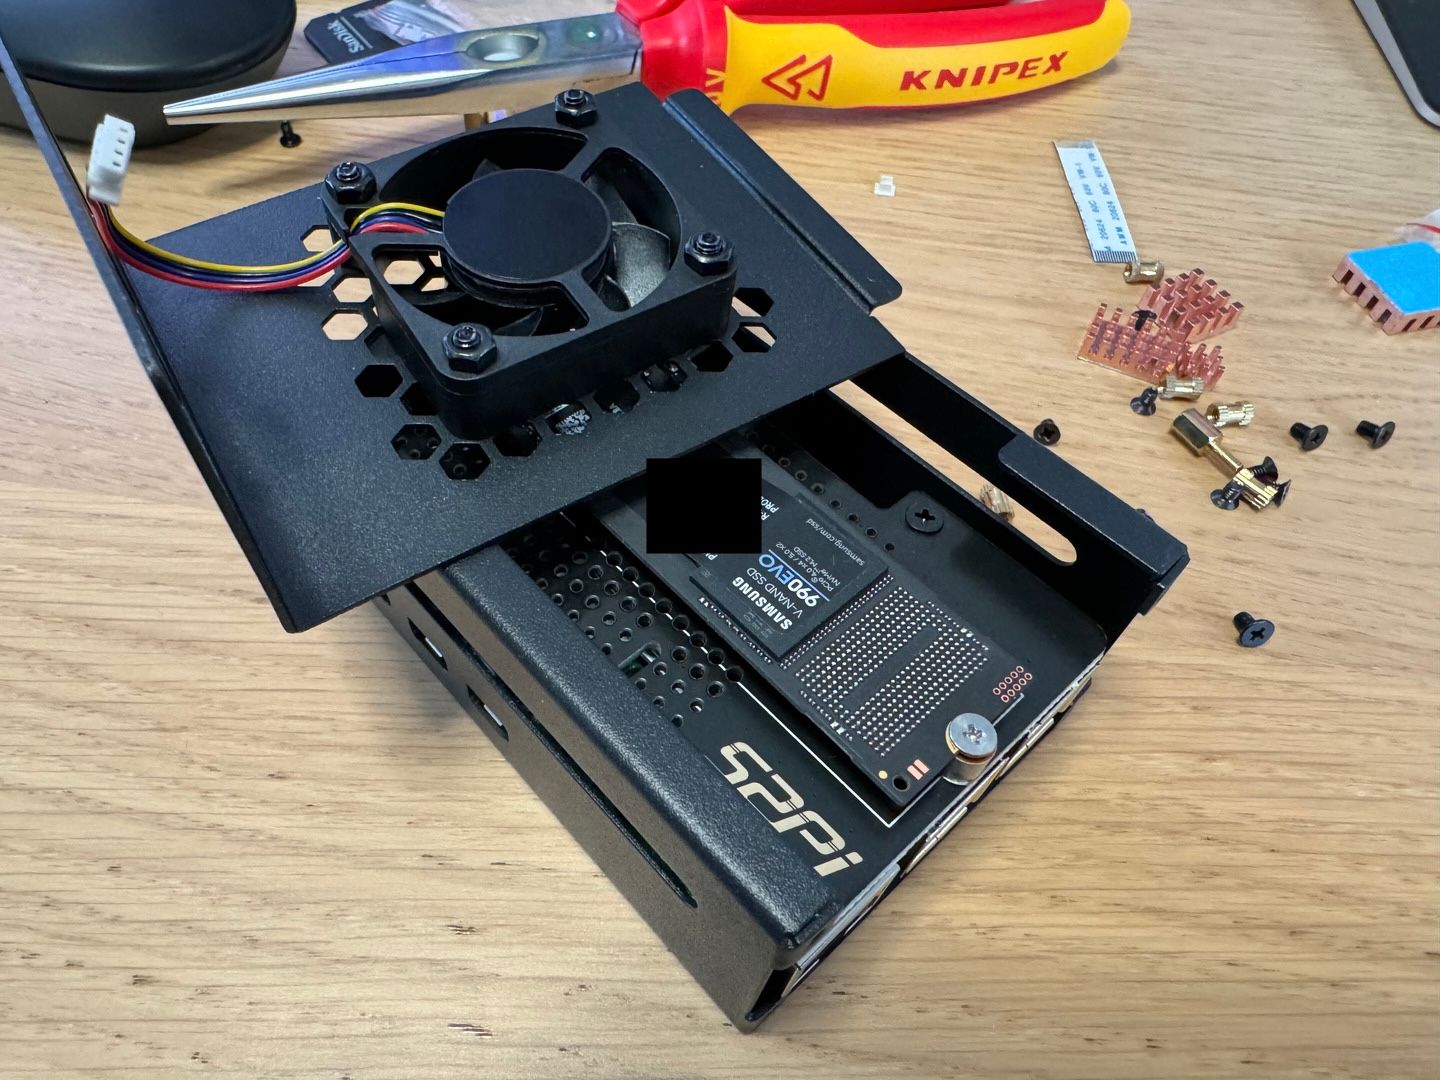
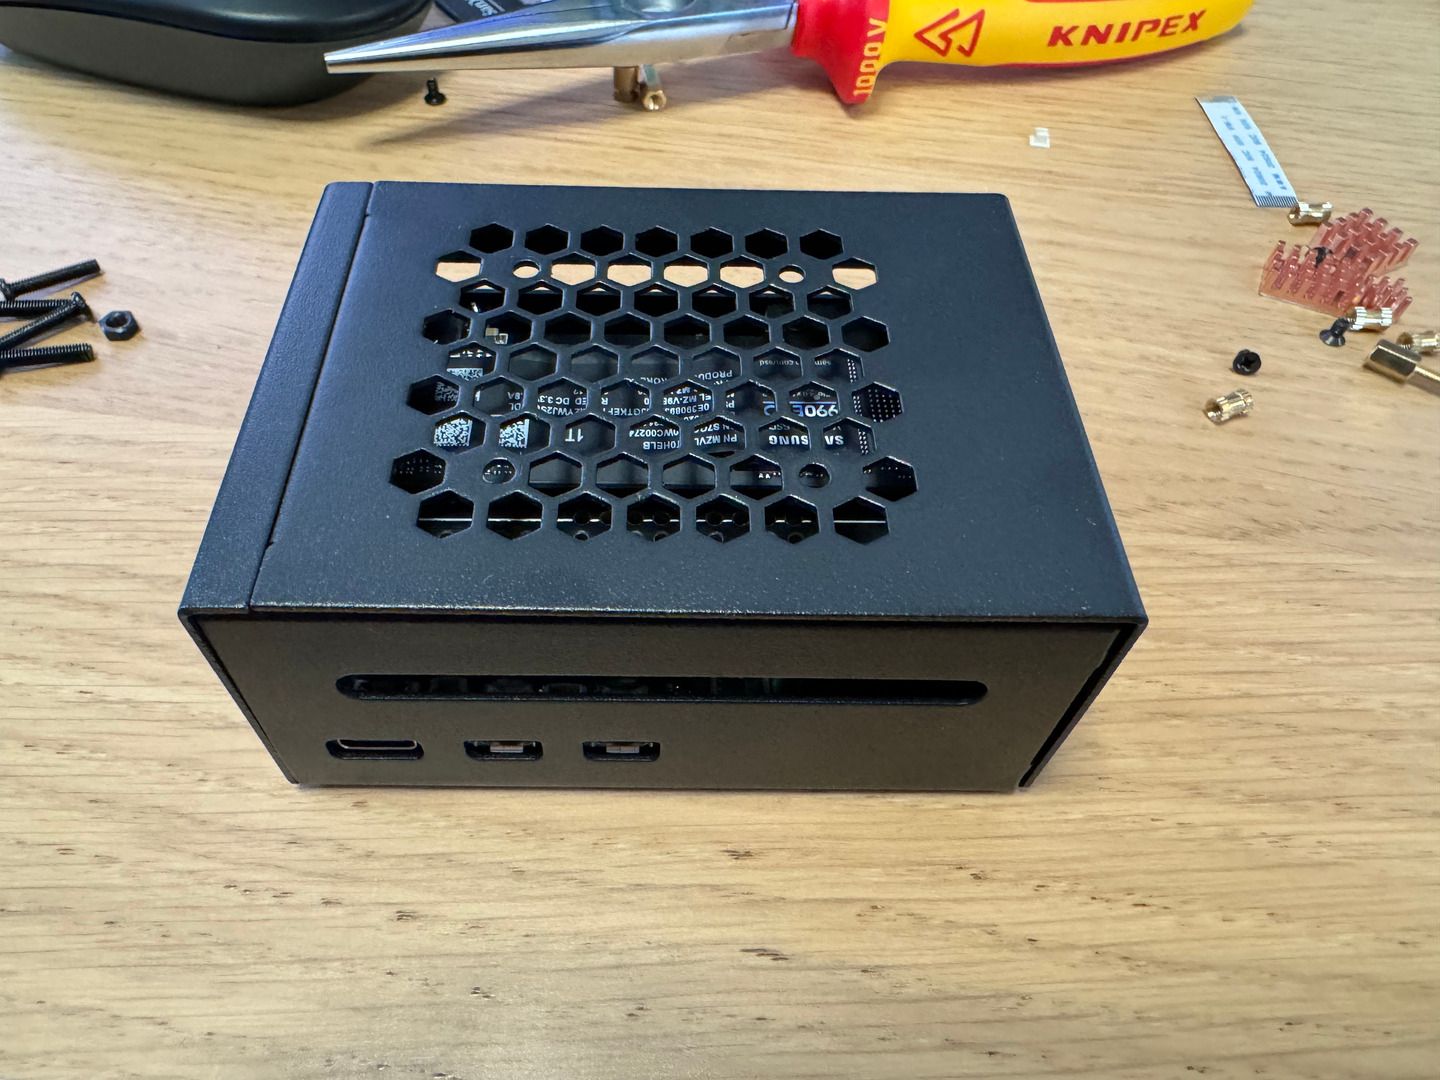
Metal case assembly
Remove all cable connections, and move the Pi 5 with the NVMe SSD hat into the metal case. Remove the fan from the closing lid, and assemble the case.
Benchmarks
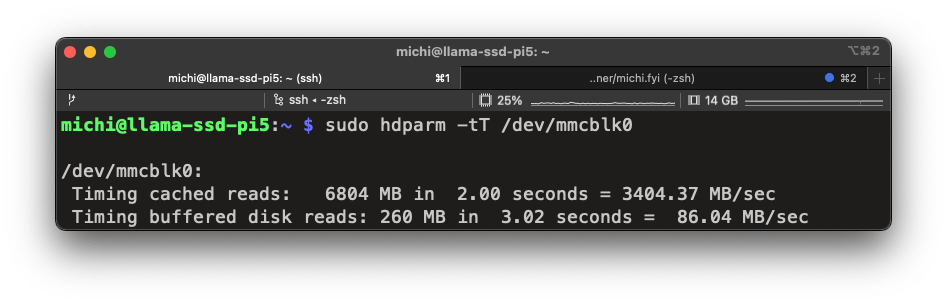
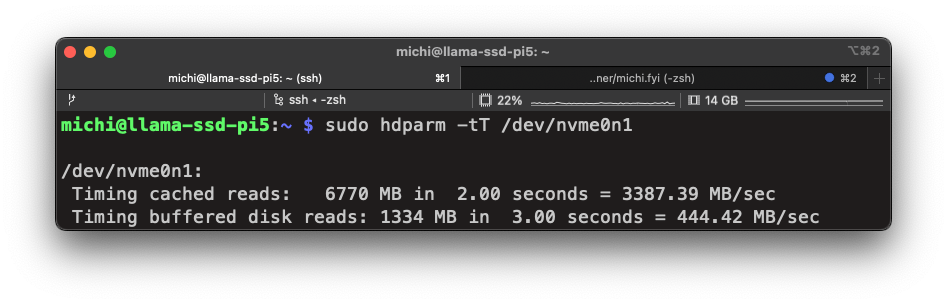
The first benchmark is conducted using the hdparm CLI command. The SSD reaches a read speed of ~444MB/s, while the SD card is at good 86MB/s – 5 times faster.
# SD card
hdparm -tT /dev/mmcblk0

# NVMe SSD card
sudo hdparm -tT /dev/nvme0n1
Benchmark comparison: llama-pi5 vs llama-ssd-pi5
The following sections run side-by-side comparisons with the llama-ssd-pi5 in this blog post, and the llama-pi5 setup with the SanDisk Extreme Pro SD card.
Test Write Speed
dd if=/dev/zero of=./TestingFile bs=100M count=10 oflag=direct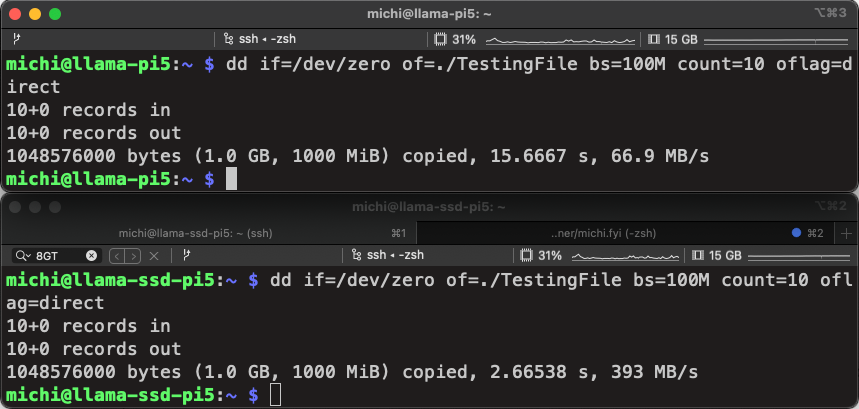
Test Read Speed
dd if=./TestingFile of=/dev/zero bs=100M count=10 oflag=dsync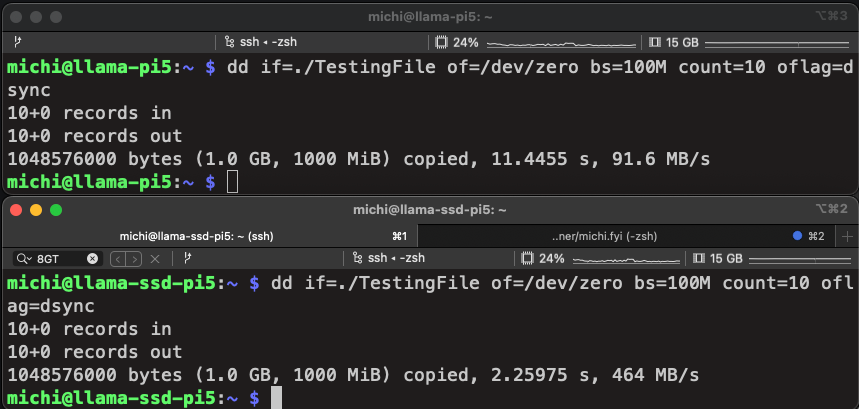
TheRemote/PiBenchmarks provides a suite of tools. Before running the script, investigate what it does. You can remove the upload procedure at the end for example.
curl https://raw.githubusercontent.com/TheRemote/PiBenchmarks/master/Storage.sh -o benchmark.sh

chmod +x benchmark.sh

sudo ./benchmark.sh
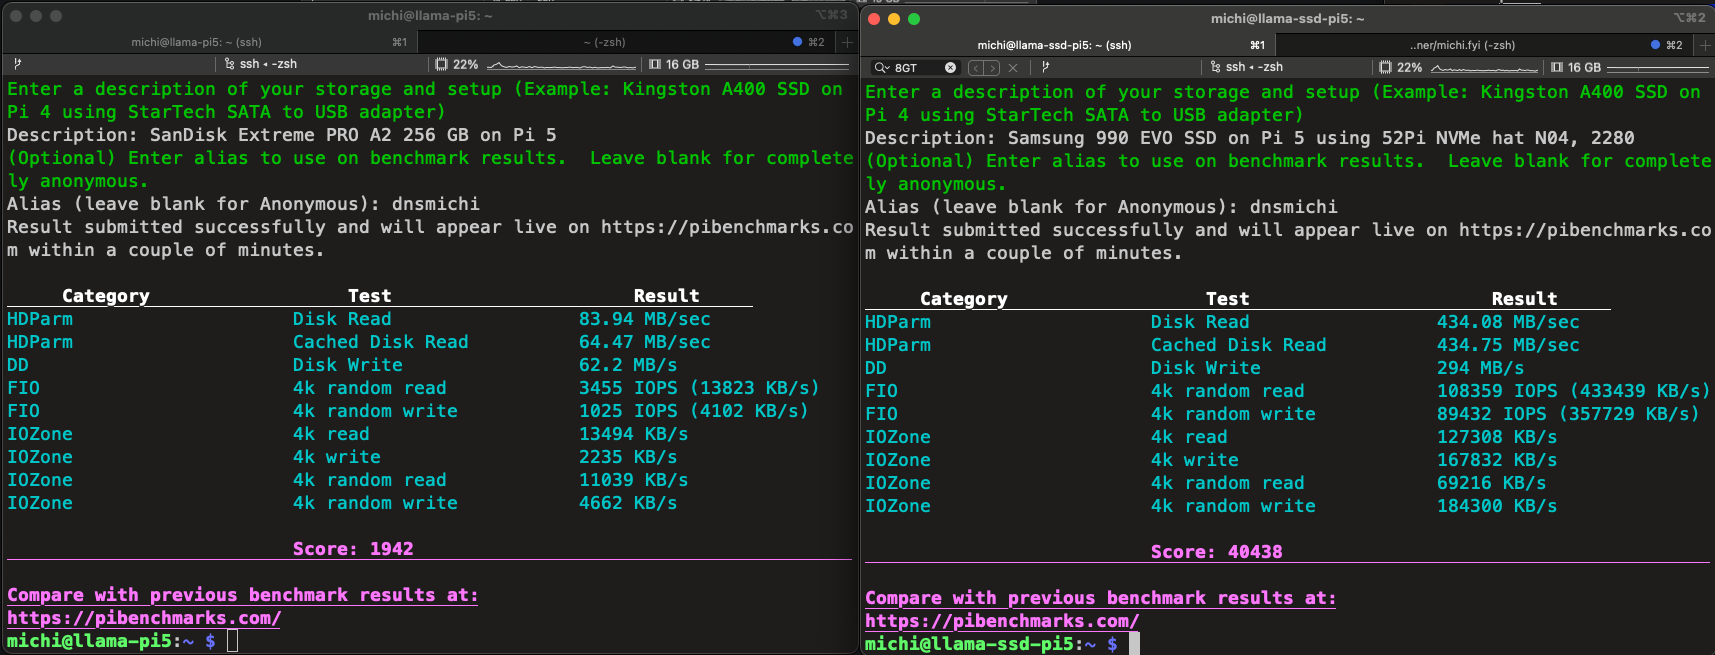
The benchmarks show the advantage of the SSD with I/O storage operations.
Can it run Large Language Models?
Lets install Ollama and on both PI 5, with and without SSD.
curl -fsSL https://ollama.com/install.sh | sh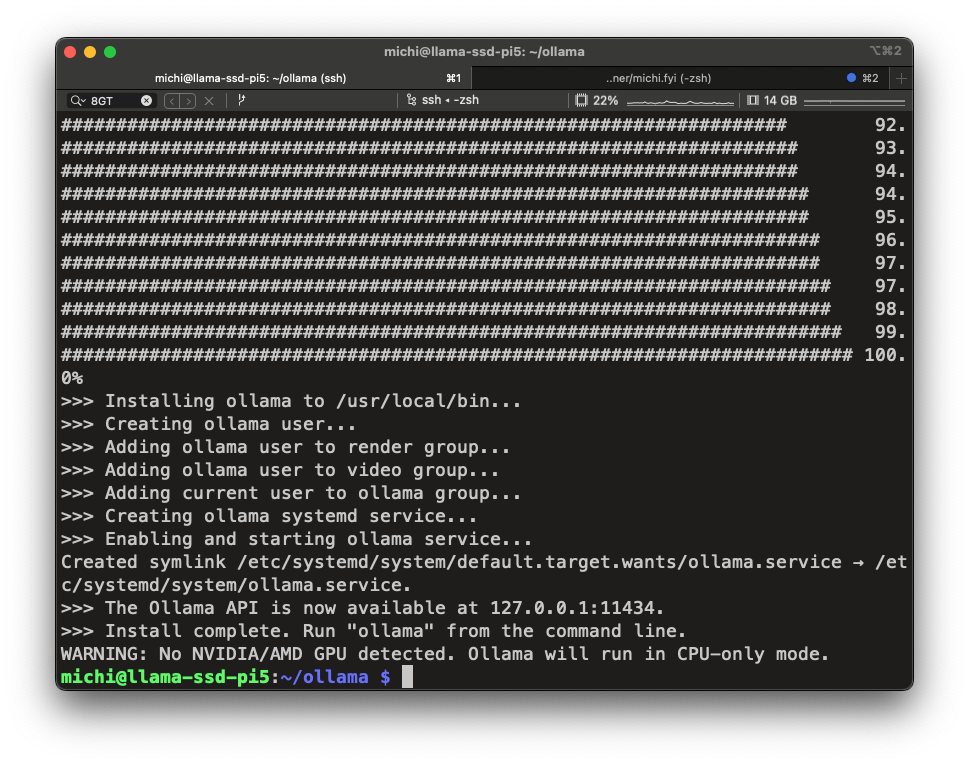
Run the Mistral LLM. It requires ~4 GB download (hence the larger storage considerations in this blog post).
Add a question to the prompt: Explain how to start a new Python project. Show best practice examples.
ollama run mistral

>>> Explain how to start a new Python project. Show best practice examples.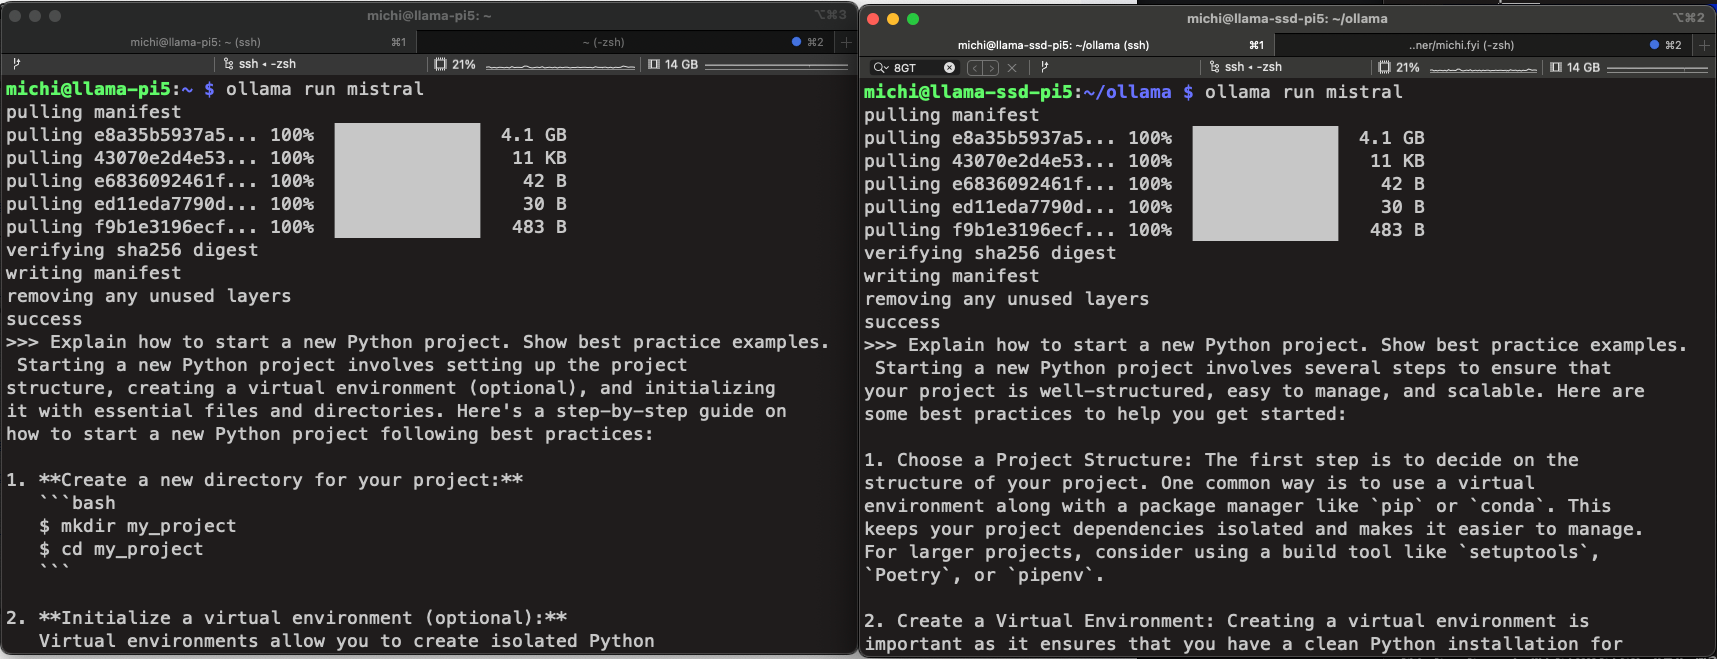
The Mistral LLM runs, but the response streaming is very slow, with the SSD enabled Pi only partially faster. One of the reasons is the missing GPU inference, putting pressure on the CPU - both fans noticeably went up in noise.
Peeking into this blog post about LLMs on Raspberry Pi 5, we can try smaller models, such as Phi2 or Orca Mini. 7b models like Mistral and Llama are relatively slow with 1-2 tokens/second.
ollama run phi

>>> How to start a Python project. Show examples and best practices. 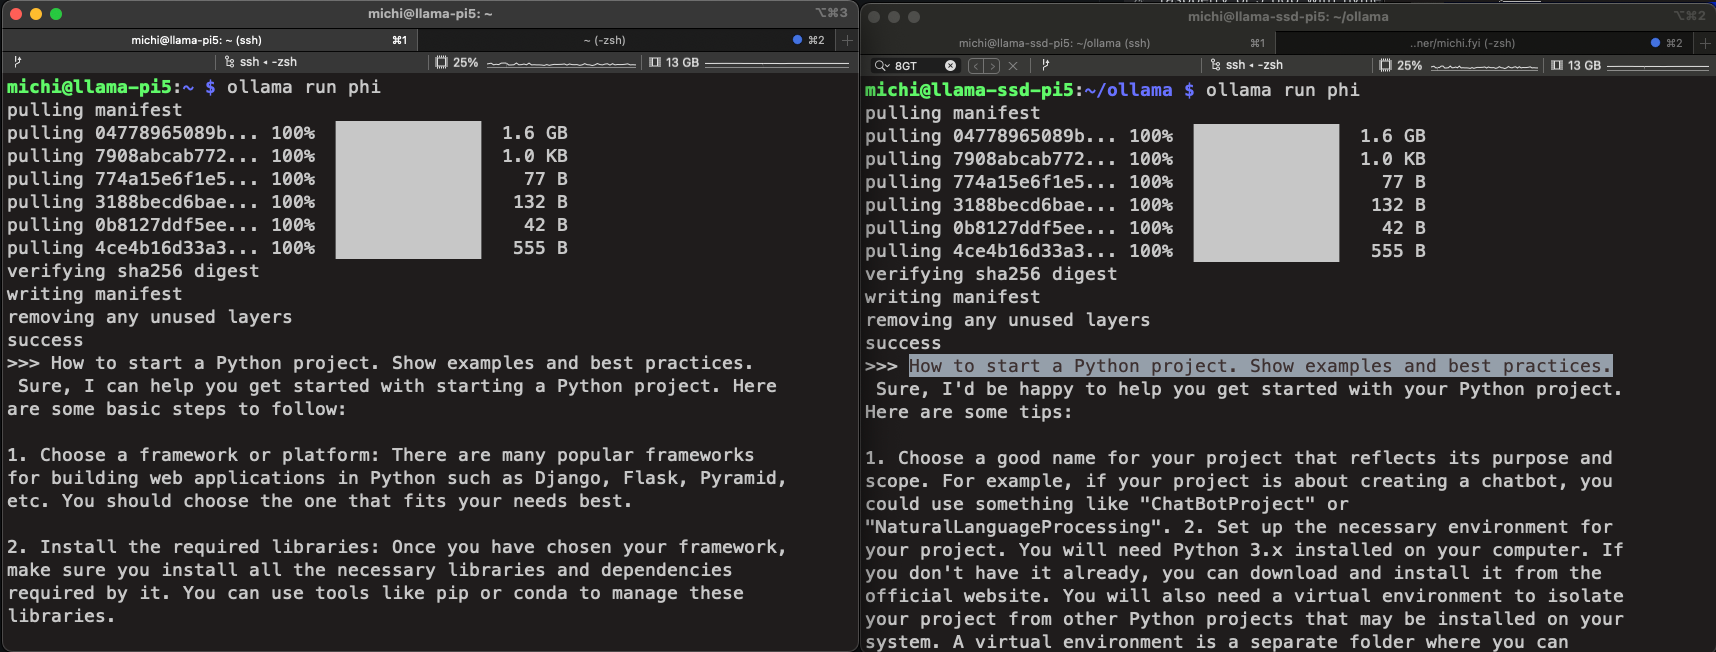
Future blog posts will explore more tuning, and how models compare. Would also be interesting to run an external NVIDIA GPU in combination with a Raspberry Pi.
Conclusion
Figuring out the different NVMe boards and supported SSDs requires research time. Tip: Remember the different form factors for SSDs (2240 to 2280) and decide for an NVMe hat option that is easy to assemble. The Raspberri Pi setup in this blog post worked on a Sunday afternoon, without running into "why does it not work" situations.
The SSD is notable faster with disk operations, by 5 times in benchmarks. The overall I/O benchmarks prove more potential here. For LLMs, the bottleneck is missing GPU support, and the CPU itself, for inference. Maybe we can tune the Raspberry Pi for greater performance in this area?
The next blog posts will compare running real tools, and explore more use cases and tuning with Ollama and LLMs. It will also include more automated setup with Ansible.
Appendix: Hardware, costs, where to buy
Please also review the recommendations in the first Pi 5 blog post which includes an external touch screen display, keyboard/mouse and network setup.
Raspberry Pi basic setup
- Raspberry Pi 5, 8 GB, Cooler Kit - 115 EUR - Weletron (official seller), raspberrypi.com with more alternatives
- If not using the Cooler Kit: Raspberry Pi 5, 8GB - 87 EUR, official active cooler - 6 EUR, power supply 27w USBC - 15 EUR, microHDMI cable - 6 EUR
- SanDisk Extreme Pro microSD 256 GB - 32 EUR - WD store, amazon.de
- Metal case: GeeekPi Metal Case for Raspberry Pi 5, Support PCIe M.2 NVMe SSD Shield Top X1001 / X1000 / N04 /N05 & Raspberry Pi 5 Active Cooler - 16 EUR - amazon.de
NVMe SSD hat
- GeeekPi N04 M.2 M-Key NVMe SSD Shield for Raspberry Pi 5, M.2 2280 PCIe to NVMe SSD Shield Pip PCIe Peripheral Board Top for Raspberry Pi 5 4GB/8GB - 14 EUR - amazon.de
- Samsung 990 EVO NVMe M.2 SSD 1TB, PCIe 4.0 x4 / PCIe 5.0 x2, NVMe 2.0 (2280), 5000MB/s Read, 3200MB/s Write, Internal SSD for Gaming and Graphics Editing, MZ-V9E1T0BW - 95 EUR - amazon.de
- Inateck NVMe M.2 USB 3.2 Hard Drive Enclosure with Cooling Pad 10 Gbps, Supports M.2 SATA B+M Key and NVMe M Key/B+M Key SSD (2242, 2260, 2280) with USB CC and USB AC Cable, Tool-Free, FE2025 - 20 EUR - amazon.de
Appendix: Additional cooling considerations
The NVMe hat on top makes it harder to just use passive cooling systems. The active cooler shipped with the Raspberry Pi needs to remain assembled.
Case cooling
Additional cooling might not be necessary, but I felt it is better to be safe than sorry, and wanted to experiment with additional case cooling options.
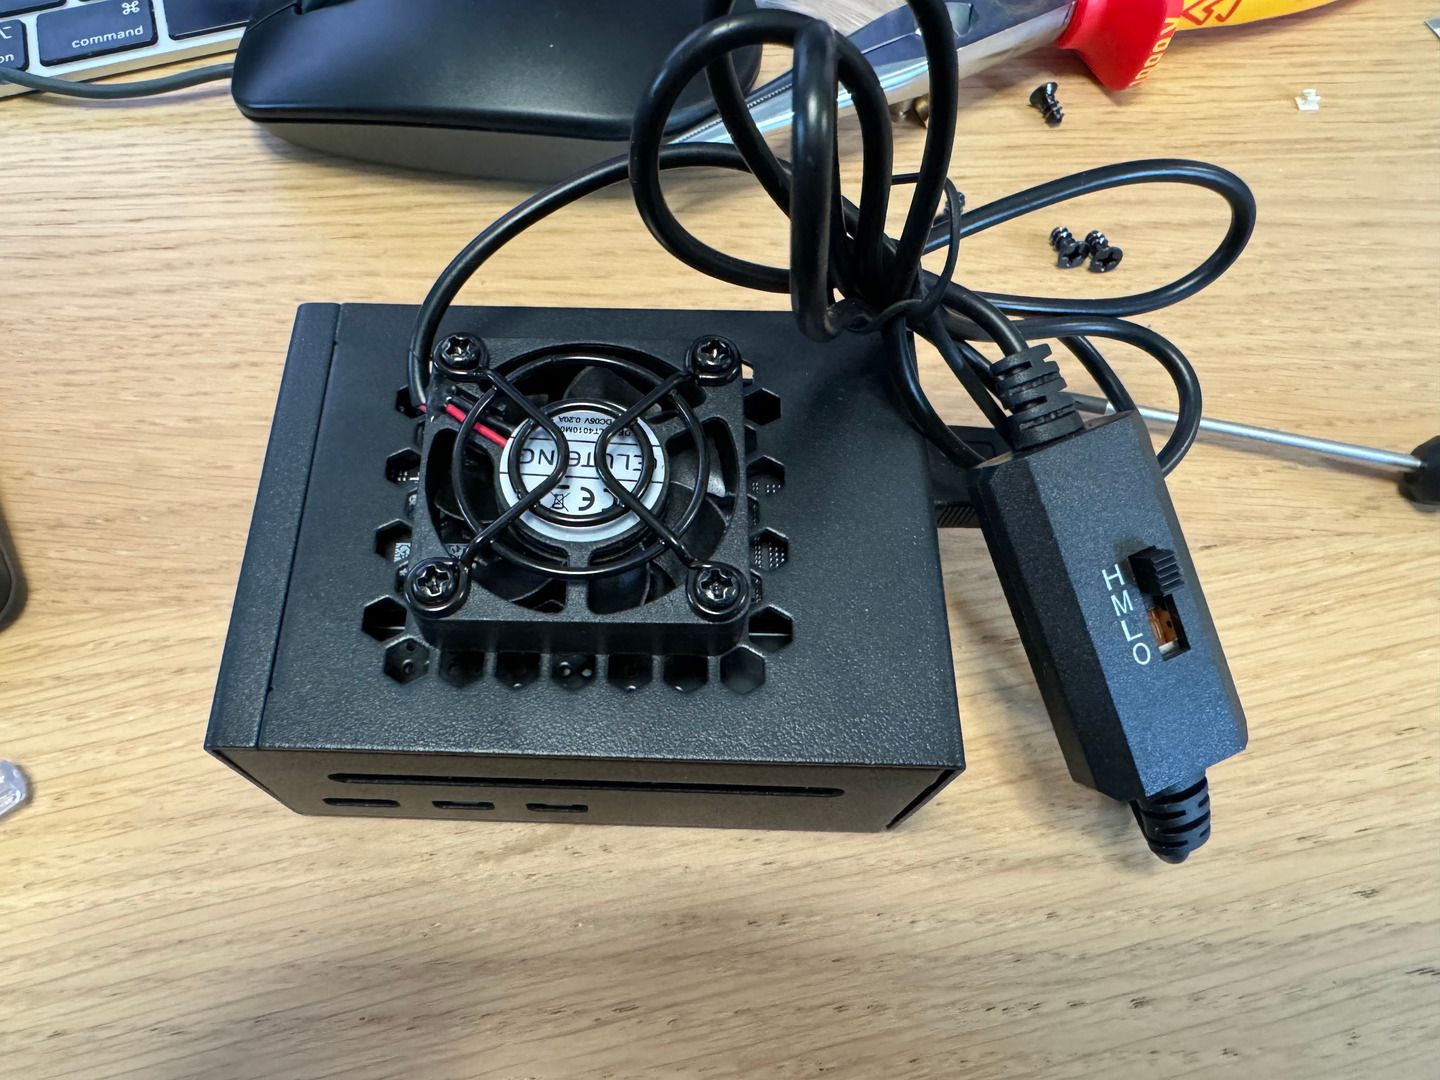
Since there is no additional PWM connector available on the Pi 5 board, I thought about alternative options outside/inside the GeeekPi case. I have found a compatible cooler which can be powered by USBA, and provides a switch for controlling the cooler fan speed. The fan can be attached on top of the GeekPi Metal Case.
- Eluteng USB fan with 3 speeds: L/M/H, PC USB connection, USB fan, quiet case fan - 9 EUR - amazon.de
Disadvantage: The fan is loud on the lowest level.
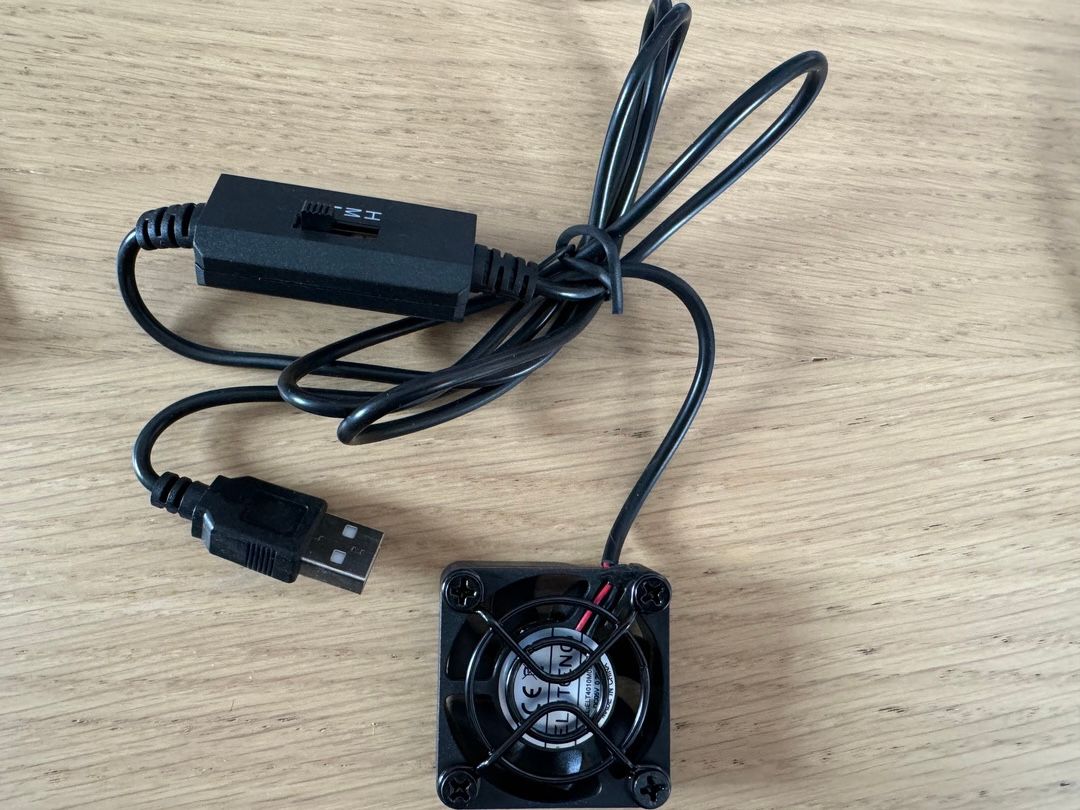
Assembly requires opening the case again, and replace the screws, attaching the fan to the outside, on top of the case.